

I found this Salmon Chowder recipe online at Woman's Day and made it last night for the family. My husband was over the moon about it! He's requested that it hit our regular rotation and I think he went back for thirds. At different points in our lives, we each did not keep strict kashrut and both quite enjoyed clam chowder. This recaptures a bit of that yummy decadent Northeast flavor. The recipe I used felt a bit unfinished so here is my updated version.
Read moreBelorussian Gefilte Fish Family Recipe


I have a real treat for you today. It was terribly difficult to not post this sooner but ... we finally got to make homemade gefilte fish with my mother-in-law and we actually were photographed by the Denver Post during the process! Here is the article that they wrote about our process - On Passover, scratch-made gefilte fish carries on ancient tradition.
Now, I must say, I was a bit intimidated to make gefilte fish from scratch. It seems like such a hard and intensive process but after hearing the recipe twice and then making it twice (once under the tutelage of my very talented mother-in-law and once on our own)... it takes time but it's not that hard! The most difficult part of this recipe is, definitely, prepping the fish to re-stuff.Here's where I have some interesting geographic information for you... it turns out that gefilte fish made in Belarus is generally sliced into sections and the sections are not fully gutted but pockets cut out with the spine and ribs still attached. This does create a situation where there are pin bones that you have to watch out for. My father-in-law is from Belarus and this recipe (the one I am about to share) comes from his mother and her communist Soviet cookbook that she brought with her when they immigrated.Ukrainian gefilte is slightly different. This is where you pull the meat out of the fish and then re-stuff it into the skin and cook it inside. I hear stories that my mother-in-law's brother is very talented in this style and we are looking forward to learning with him, how to make it.So here is the recipe for our Haykin Family Gefilte Fish. Please note, we translated this recipe from a pinch here, a toss there, taste the raw fish to see if it tastes right... into a recipe you can follow. I apologize if there are things that are not clear. Comment here and let me know if you have questions!
All pictures in this piece are courtesy of the magnificent Cyrus McCrimmon of the Denver Post... who is not only a phenomenal photographer but also a lot of fun to have around for a couple of hours on a Tuesday afternoon.
Ingredients:
5 pounds trout (buy the whole fish, for 2.5lbs it is usually two fish)
1 pound cod
2 large onions
2 large beets
2 carrots
2 eggs
1 tablespoon oil
4 tablespoons matzo meal (or 3 slices of bread - dried and crumbled)
5 teaspoons kosher salt
1 teaspoon sugar
¼ teaspoon black pepper
Start with large whole fish, trout in our case, which are scaled and cleaned. Cut the fish into 1-2 inch segments. Using a sharp paring knife, cut the fillet meat out of each section, cutting around the ribs and spine. When you’ve removed the meat, you will have two hollowed chambers on each piece of fish. Combine the trout meat with the cod meat and chop finely (you can put it in a food processor). Remove fish and place in a medium sized bowl.Next, combine ONE whole onion (save the second onion for later) with the oil, eggs, matzo meal, salt, sugar and pepper in the food processor. Process until it becomes a loosely processed paste. Add mix to the fish and let rest while you prepare the vegetables.Next, slice the beets and remaining onion into half circles. Chop the two carrots into rounds. (Keep these vegetables in these shapes for cooking.)Take the fish pieces, which are hollowed out, and pack the fish paste mixture into the gaps on both sides and into the bottom. Pack this mixture into every gap in the fish segment. Do this gently and form it carefully. It can easily rip or ‘smush’ out. Set aside the segments as you complete them. It is very easy for the filling to escape before it is cooked, but afterward it will hold together nicely.Now we are ready to assemble the pot. Start by lining the bottom of a medium to large stockpot with onions. This helps keep the fish from sticking. Now carefully line the bottom of the pot with fish pieces and insert beet slices between each piece of fish, so that nothing touches. If needed add a second level of fish. First, line the top of the fish with a layer of sliced onions, then place the fish in, again separating the segments beet slices. As you go, sprinkle fish segments with carrots slices.Once the pot is assembled, cover the fish and vegetables with water very carefully (trick: we pour water into the pot on the stove slowly from a bottle or measuring cup, letting it run down the side of the pot) to make sure you do not disturb the fish mixture at all. It will still easily come apart before cooking.Turn stove top on to a medium/high heat until it just starts to simmer. Watch this very carefully! A rolling boil will, again, make the fish mixture come apart. As soon as there is a slight boil, turn the heat to the lowest setting and let it cook for approximately 3 hours. It must be the lowest possible temperature. The goal is to cook very slowly on low heat. Any amount of boiling or rolling boil will disrupt the very delicate fish mixture.Once it is cooked, remove the sections and arrange on a platter so it resembles the original fish. Garnish with vegetables from the pot. Traditionally, people put a carrot slice on top. You can use the beets and onions as a bed for the fish. Gefilte is typically eaten cold.
Homemade Turkey Meatballs For Baby

Our food journey has been really challenging with the nugget. He's struggled with prolonged vomiting and now has some trauma around eating. Except carbs. He loves his carbs.This summer he was pounding yogurt and milk and eating his weight in puffs, crackers, and all manner of bread products. He was refusing anything else I offered him in the fruit and veg families, with the notable exception of bananas... the great binder of the fruit family.I think you know where this is going... We had so many mornings of horrible crying and so much pain and pushing because now... we were constipated. That poor guy! 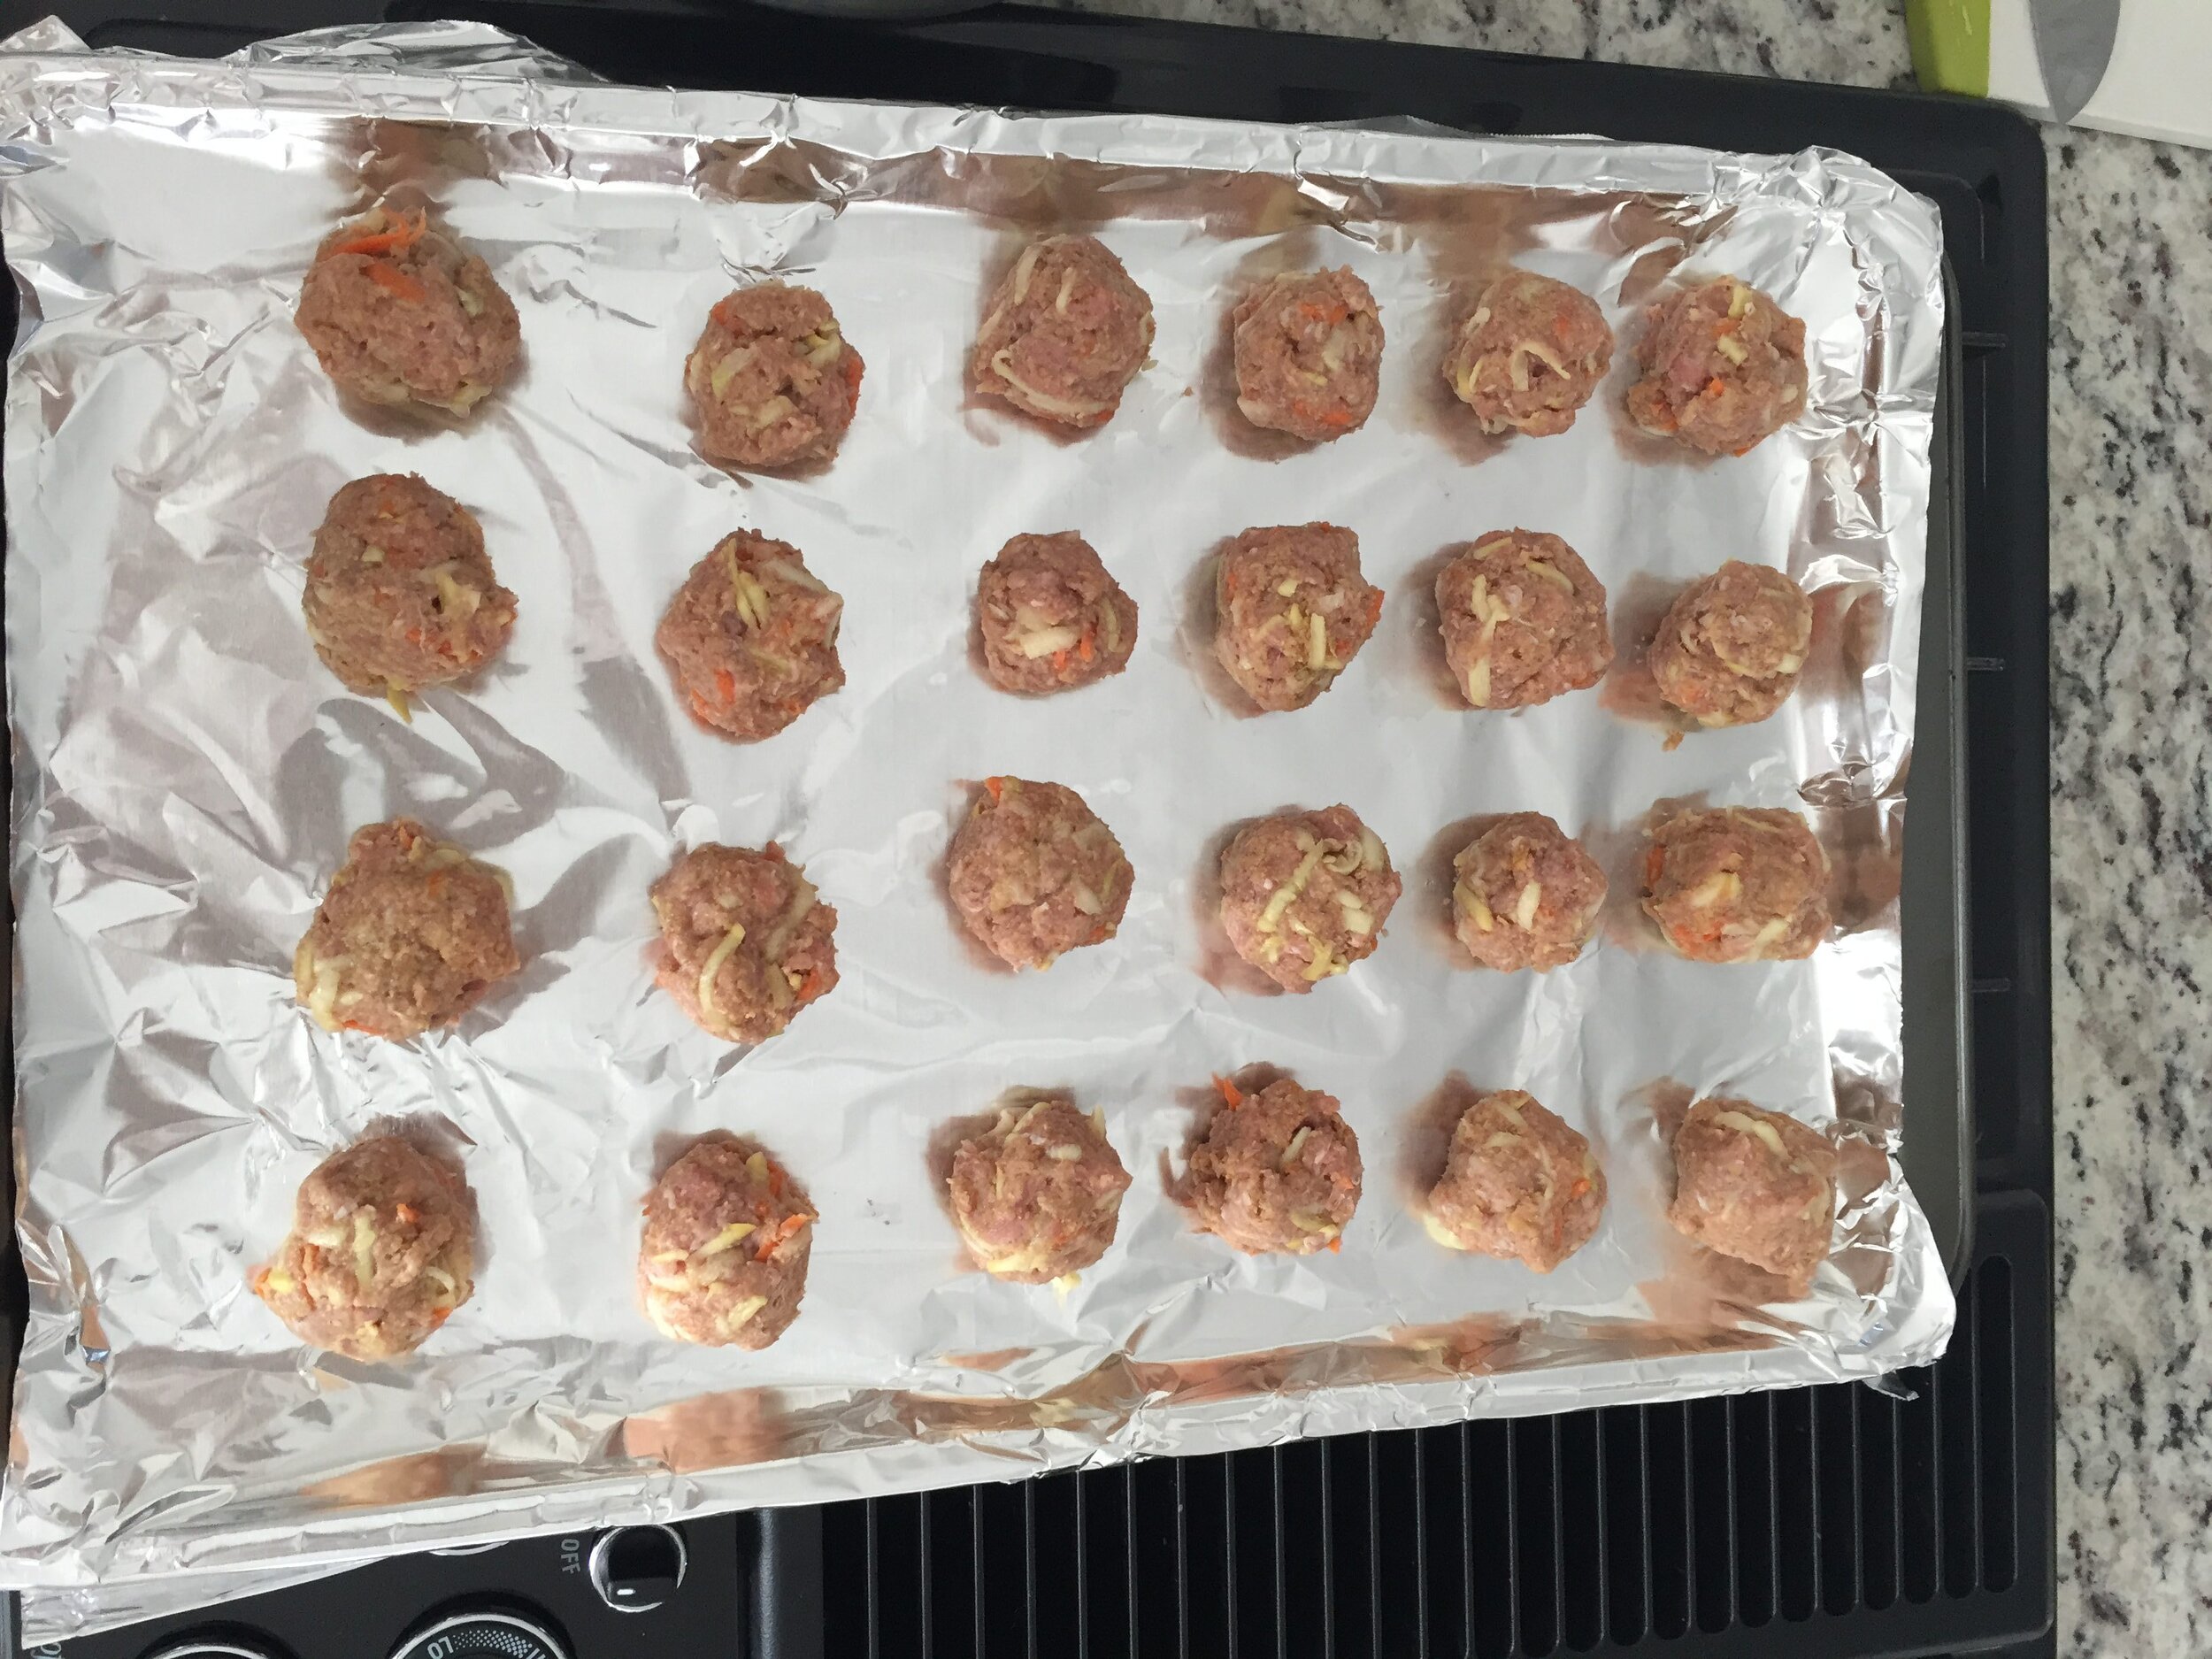 He just can't get it together. Everyone had suggestions but with a toddler attitude and the traumatic memory around eating (three weeks of vomiting when you eat will do that to you... anyone remember tequila and college? Or Captain Morgan's... omg just thinking of that makes me a little queasy...) we were getting nowhere. He was open to prune pouches but they weren't totally doing the job. A friend and I were talking about sneaking veg into meatballs so I decided... it was time.I looked up a number of recipes and decided on this one as our base recipe with some modifications from other recipes I saw online. Honestly, you can use any summer squash you are growing or find at the grocery store. Pattypan, calabacita, zucchini, yellow squash. You will find zucchini and yellow squash nearly year round at your grocery store... I recommend buying it frozen if it is not in season (aka not in the summer). Frozen veggies are amazing in that they are picked at the peak of freshness and flash frozen. I prefer buying them if something is out of season. Plus they are SO cheap!Nugs Homemade Turkey and Secret Veggie Meatballs -
- 16oz of lean ground turkey
- 1 carrot (peeled and grated... or just washed and grated...)
- 1 small zucchini (peeled and grated)
- 1 small yellow squash (peeled and grated)
- 1/2 cup Wheat Germ
- 1 egg
- 2 teaspoons garlic salt (or split it up, garlic and salt)
- 1 teaspoon of onion powder (if you want)
- 1/2 teaspoon of fresh ground black pepper (if you want)
Heat the oven to 350 degrees (F, of course). Line a baking sheet with parchment paper... if you don't have parchment paper (which I didn't), you can use foil but for the love of all that is holy OIL THE FOIL! (haha... oil the foil...) These guys stick to the pan. Combine all the ingredients in a bowl and mix together with your hands. The recipe I linked to had a really good instruction for this part... don't over mix it, it will make the meatballs tough).Form your meatball and place on the tray. If you are a 'rule follower' you can use a tablespoon scoop or you can make them your own size. I did a bunch of small ones for nugs and some bigger ones for our dinner. The original recipe says you will get 48 but I got less.Put them on the baking sheet (NOT TOUCHING) and bake for 20 minutes.---These were delicious and even my husband enjoyed eating them. It's a great way to sneak in veggies and they freeze/defrost really well.Share your comments, pictures, and variations below!
Homemade Beans & Rice

 My little guy is about as brand loyal as one year olds get! When it comes to food, he's pretty much obsessed with the Plum Organics pouches. And of these pouches, his absolute favorite is the Plum World Baby Mexico pouch. The ingredients are beans and rice with sweet corn, red bell pepper, cilantro and lime. Pretty fancy for baby food, eh?Well at $1.30+ per pouch I thought, maybe I can make a close approximation for the nugget for less per serving. I found these recipes online and thought I could use the ingredients from the Plum pouch and the quantities from the recipe to make something that nugget enjoys. I really just tossed things in and we got a pretty good end result. No great pictures of nugs eating it but here's my guesstimate recipe and some pictures of the mixture.Nugs Homemade Beans and Rice pouch -
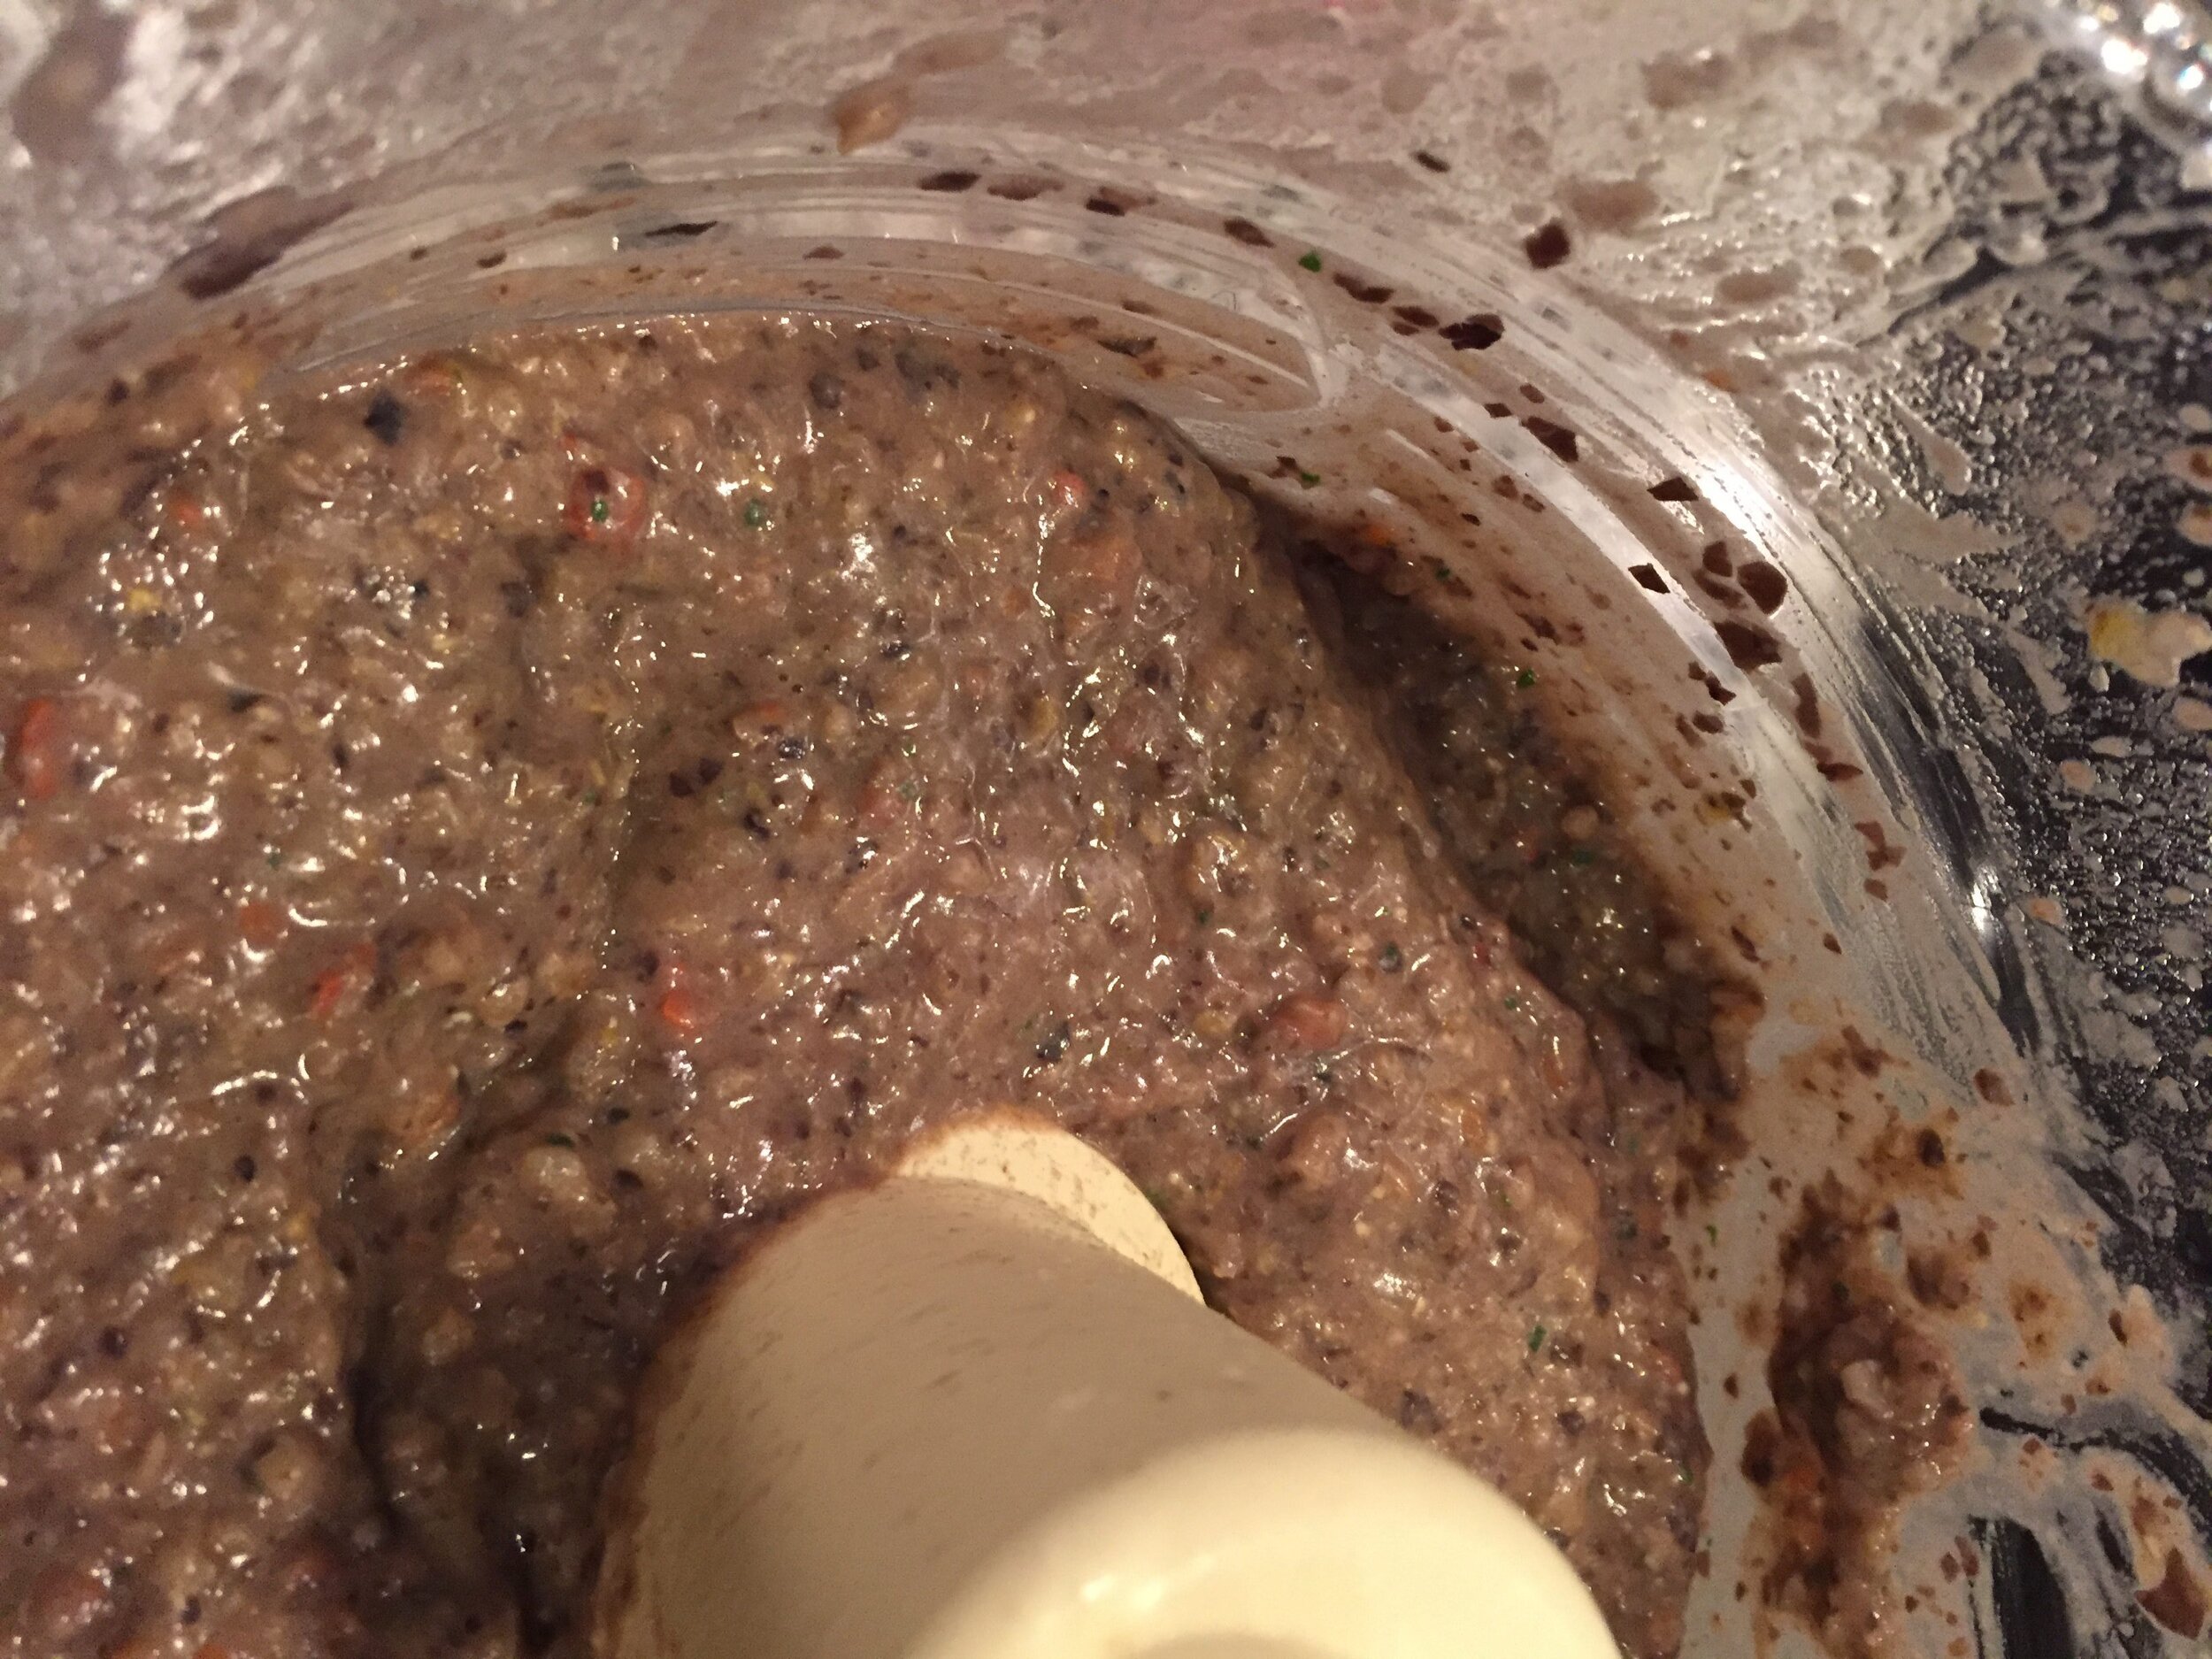
- 1 cup organic brown rice
- 1/2 a red bell pepper
- 1/2 cup of frozen sweet corn
- 1 can organic black beans
- Handful of fresh cilantro
- 1/2 a lime, juiced
- Water (as needed)
Prep the rice as you normally would (and if you are as hopeless as I am at cooking rice, here are some tips).Saute or bake the bell pepper until soft and defrost the corn.Combine it all (rice, pepper, corn, beans, cilantro, lime) and puree. Slowly add water as needed to smooth it out. You could also use chicken or vegetable stock, formula, breast milk... whatever liquid you want.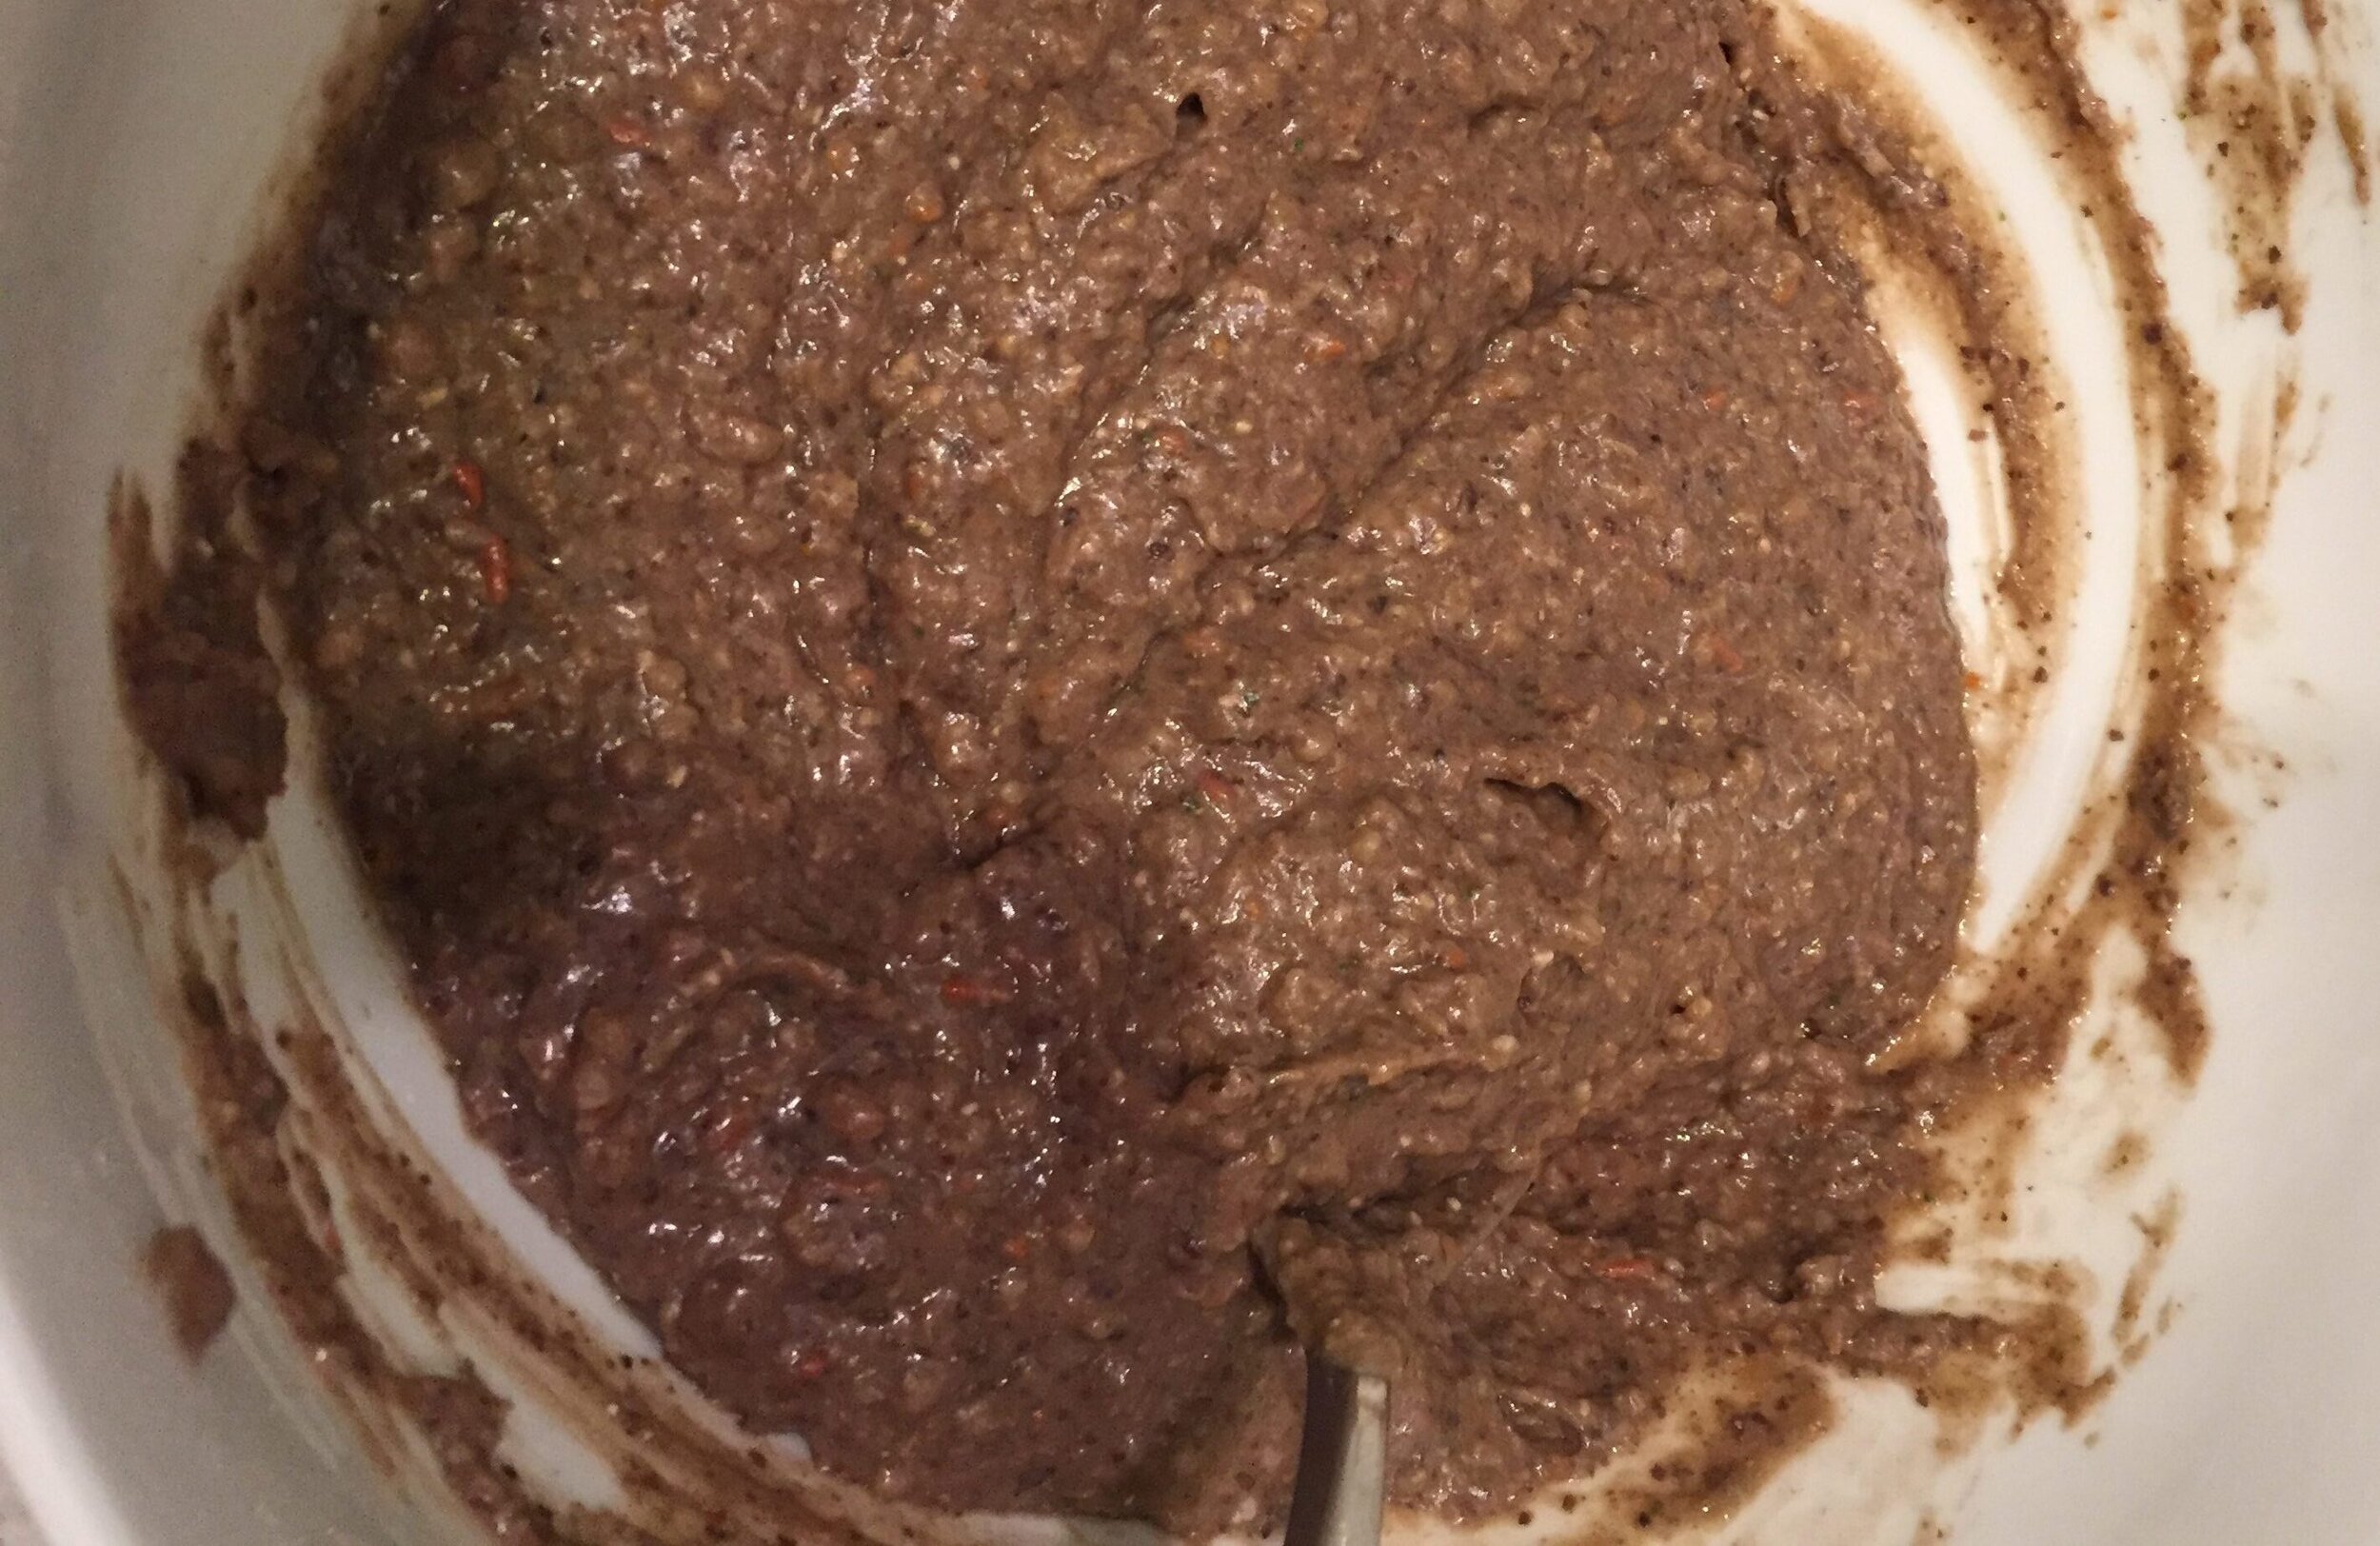 The liquid is where I went wrong on the first attempt. I didn't add enough and it was still a bit too thick for nugs. The other recommendation I have is TASTE IT! Try it and see what it needs. Maybe more or less lime, cilantro... maybe toss some salt in. With nugget, he has reflux and so he actually need salt and seasoning to make food taste good to him. Between the burning acid and the medicine that dulls the tastebuds, he prefers seasoned foods but more on that another time!Post below with pics and stories after you try the recipe! I would love to hear it! Does your nugget love a particular brand of food?
Homemade Prune Filling
It is will great disgrace that I realize I haven't blogged in a year. But it's been a rough year. We know it's been at least a Jewish calendar year since my last post was about Hamentaschen. I just wanted to share again, the amazing Prune Butter recipe I found last year from Tori Avey. You can find her Lekvar Plum Butter recipe in full, with stunning pictures, here.This year, I felt comfortable enough with the consistency and idea of the recipe to freehand it a bit. I also did not remember to get the oranges I needed so I had to improvise... this was a common problem for me this year... being 6 months pregnant, my brain seems to have taken a vacation to Hawaii. I also forgot the lemon juice for the hamentaschen dough recipe (you can find that recipe here). What I learned is that white vinegar can substitute nicely for lemon juice. It gives the acidity but no flavor. It worked fine but (baby brain) I left the dough too long before I baked them (think 2 days) and it dried out so I had to start over. Fortunately then I had lemons and added the juice. It really does give it a nice zing.Anyway, here is my modified Plum Butter recipe that I used this year. My proportions are cut in a quarter from Tori's recipe. That was plenty for me to make half a batch of prune. Last year I had a ton of filling left over. I only make one batch these days but ... maybe I will be making more for preschool classes in the near future B'H!Kosher, She Eats Modified Plum Butter recipe (with ultimate gratitude to Tori Avey!)[ingredients]DON'T LET THESE MEASUREMENTS DRIVE YOU CRAZY! I only had a 1/2 cup of prunes so that informed the whole thing. I just felt it out. It needed a bit more water while it was cooking so I added it. I also used white bakers sugar because I couldn't find my brown sugar.Directions:
- Combine all of the ingredients in a saucepan except for the brown sugar. Stir and bring to a boil for one minute.
- Reduce heat to medium low so the mixture simmers slowly and constantly. Cover the pot. Let the mixture simmer covered for 20 minutes, stirring every few minutes.
- Remove the lid from the pan. Let the prunes continue to simmer for 3-5 more minutes, stirring frequently, until most of the liquid has evaporated/absorbed. Keep a close eye on the pan to make sure the prunes don't burn. When there are about 3 tbsp of liquid left in the pan, remove from heat.
- Stir the brown sugar into the prune mixture till brown sugar melts and dissolves.
- Mash the prune mixture with a potato masher till a smooth puree forms. Run a fork through the mixture to break up any pieces the potato masher missed. You can also use an immersion blender for a smoother puree, if you want to.
- Let cool to room temperature before using. Store in a sealed, airtight container in the refrigerator. Refrigerating the filling to chill completely will make it easier to work with when filling hamantaschen.
These are Tori's instructions. They work pretty darn well. I was using a tiny saucepan since it was a small batch. We got a 0.5 quart all-clad butter warmer for our wedding. It was the best gift ever (thanks Joan!) because Dan uses it to warm his cream up in the mornings and I use it for tiny projects like this. Only downside is, it doesn't have a lid. So I did the recipe uncovered. It would have absorbed better covered but it worked just fine. So if you lost your brain (like me) or are in a rush (like me) you won't ruin it if you don't cover it. I also didn't let it cool fully before I used it and didn't mash the prunes enough. I tossed it in the fridge while I did the poppyseed filling and then used it. It was fine but she is right, it will work better cooled. As for the lack of mashing... it didn't seem like enough to use an immersion blender. And the pot was too small for a potato masher... so I violently attacked it with a fork. If I had more time, I might have used two forks. As people have been eating them, there are larger chunks of prune than I would prefer.Regardless of all of my shortcuts and changes, it's a tasty recipe and is now permanently in my arsenal. Now I need a homemade poppyseed filling... anyone have any good ones? 
Great Hamentaschen Bake Off of 2014
I know this post is late. I know! But how can you have a Great Hamentaschen Bake Off before Purim! And then I was a slacker. I admit it. A friend of mine and I decided to have a bake off. My recipe can be found here - We Put The Mon in Hamentaschen. This year I made my own plum filling from a recipe I found at The Shiksa In The Kitchen. Here is her recipe. I will give you Megan's recipes for the dough and the insides as well as my doctored recipe for the plum filling.
Megan's Fancy (and Delicious) Hamentaschen:Dough Ingredients:
- 1 cube butter or margarine
- 1 cup sugar
- 3 eggs
- 1 tsp baking powder
- 1/2 tsp baking soda
- 3 1/2-4 cups flour
- 1/3 cup orange juice
Dough Preparation:
- Cream the butter and sugar
- Add eggs
- Mix dry ingredients in a separate bowl (start with 3 1/2 cup flour)
- Alternate dry & wet ingredients
- Add more flour if dough is too sticky to roll
- Roll dough and cut into circles
- Fill with dried fruit mix
- Wet finger and dampen edge of dough circle
- Squeeze circle together in 3 places to form triangle
- Brush with beaten egg and bake at 375° for around 15 minutes
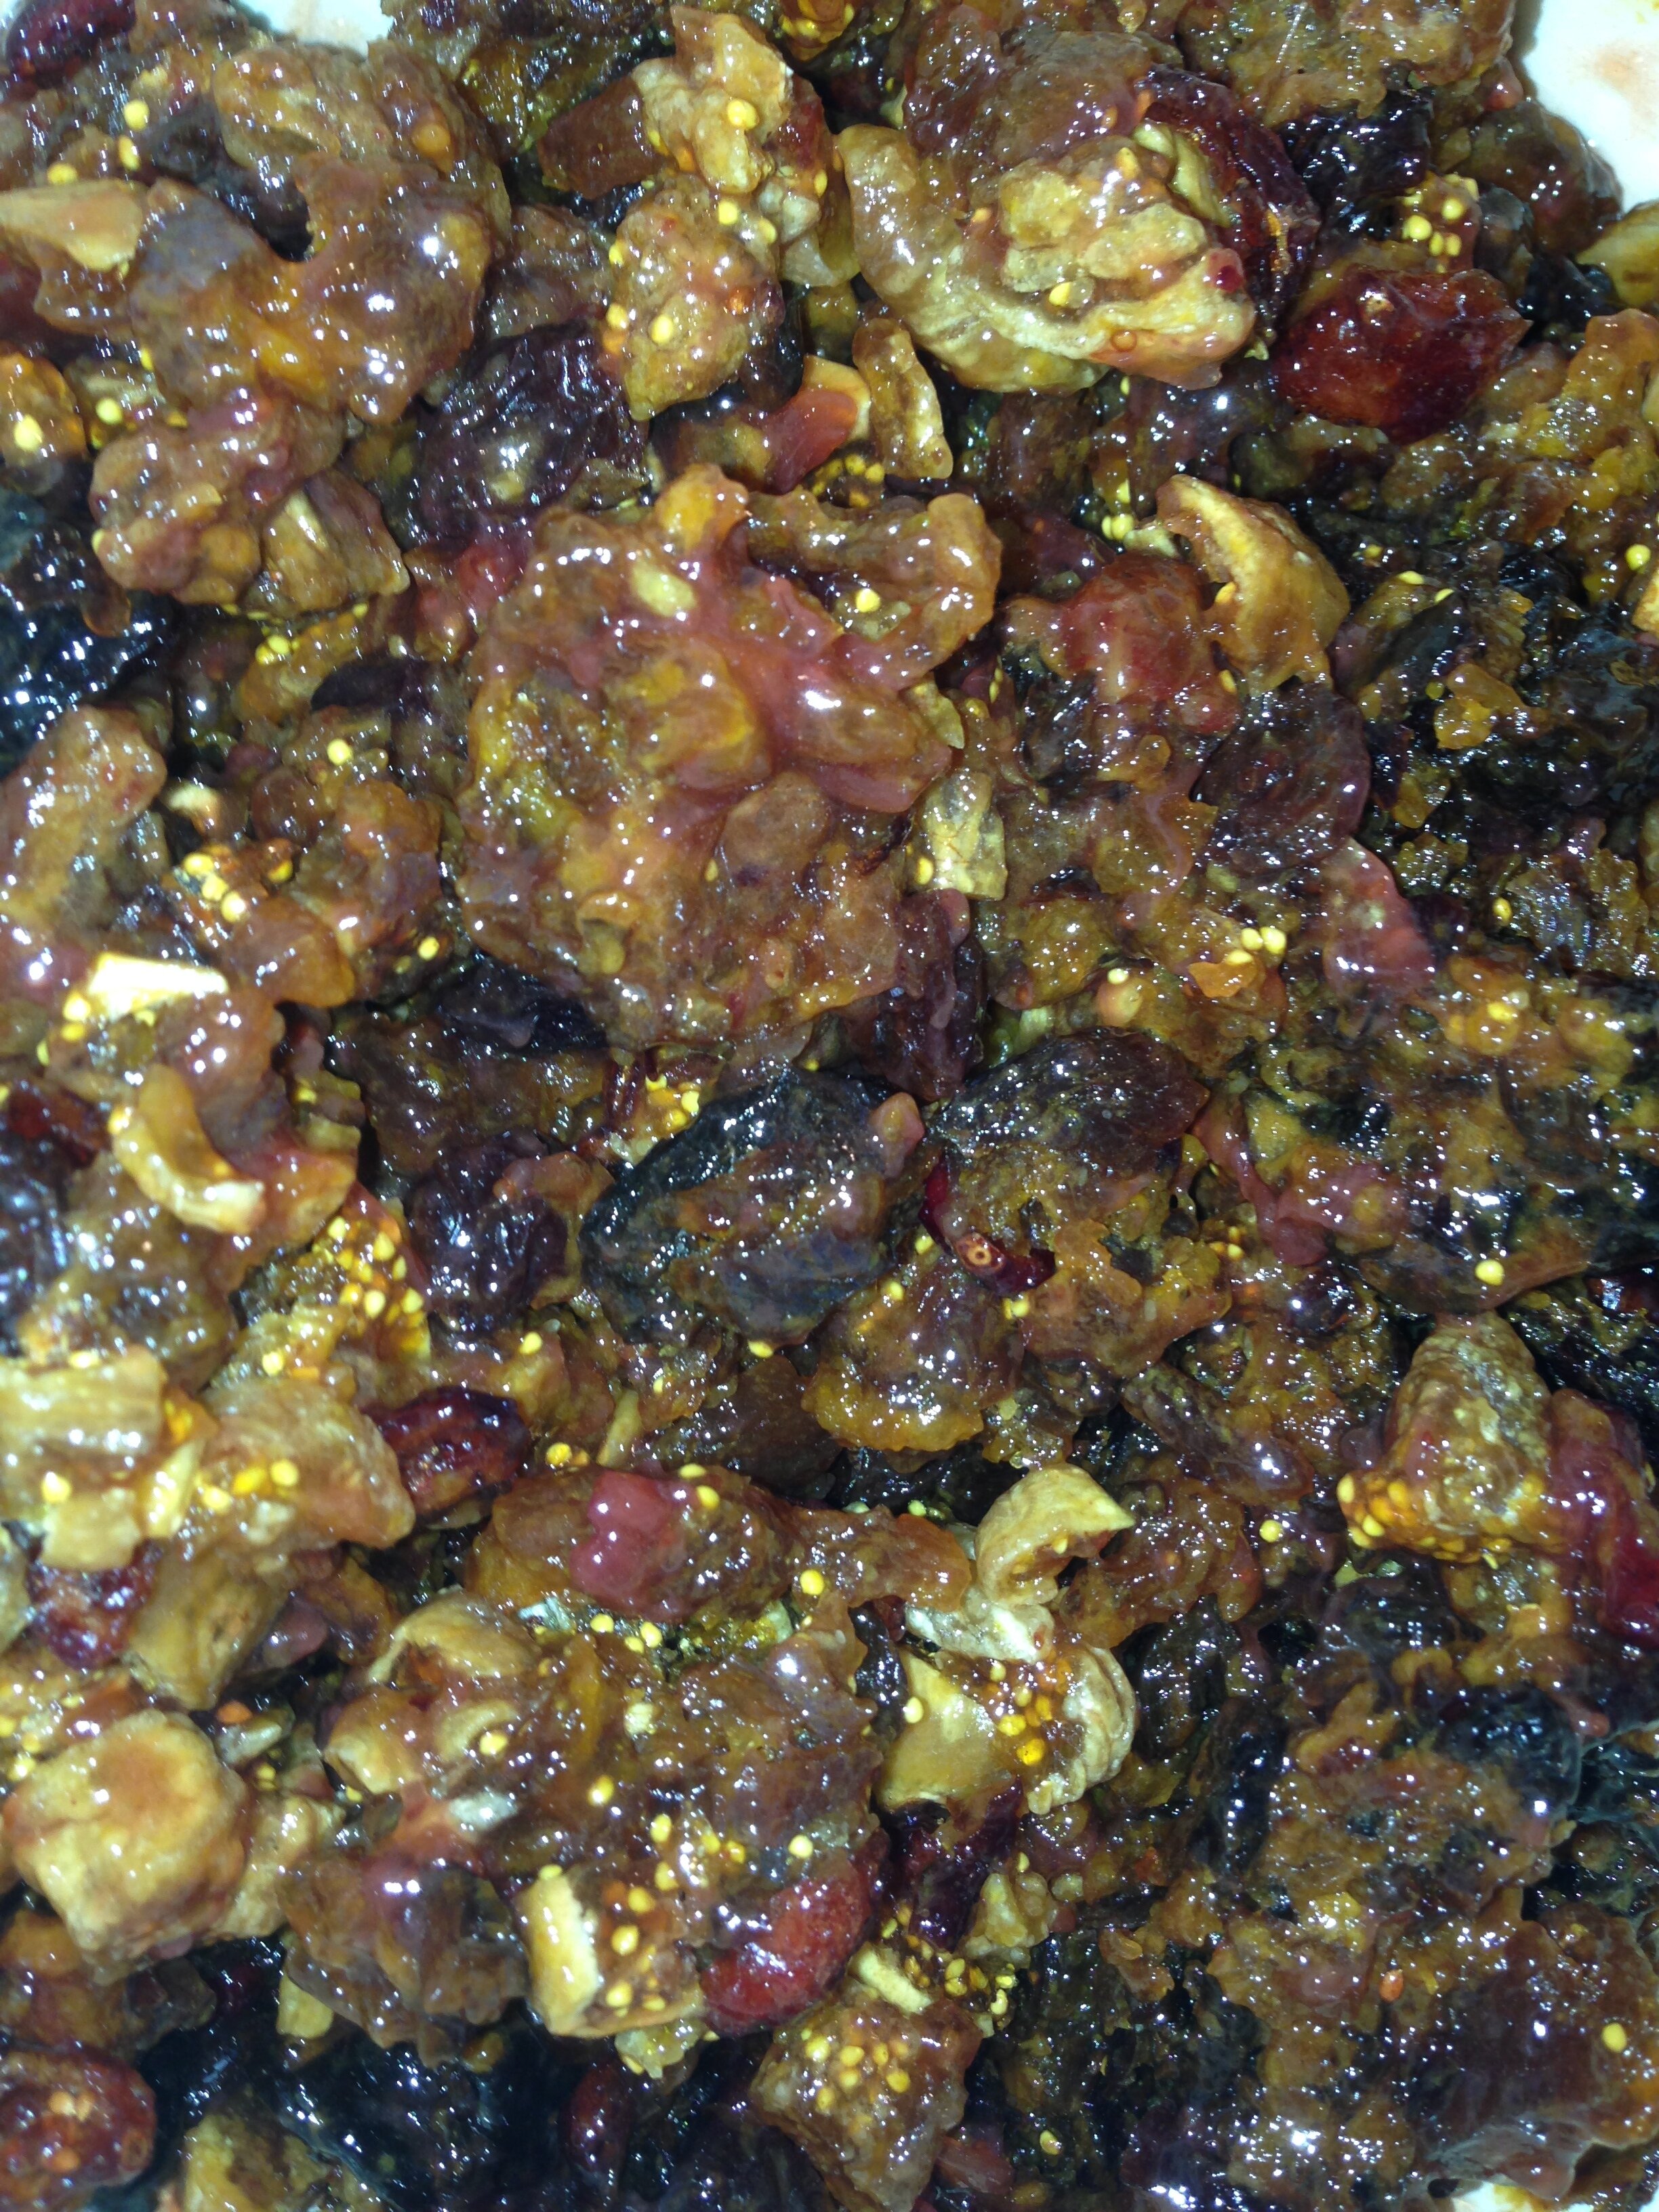
Dried Fruit Filling Ingredients:Around 3oz of each:
- Prunes (pitted)
- Raisins
- Dried apricots
- Dried cranberries
- Dried figs
- Dried dates (pitted)
Plus some strawberry jam
Dried Fruit Filling Preparation:
- Chop fruit up in food processor. If you don't have one and you are cutting by hand put some oil on the knife to keep it from getting gummed up by the dried fruit.
- Put all chopped fruit together in bowl and mix in strawberry jam until everything is mixed together.


KSE Version of Plum Butter Hamentaschen Filling:Ingredients (This makes a lot! You can reduce by half!):
- 1/4 cup orange liquor (I used Solerno Blood Orange Liqueur and Ferrand Dry Orange Curacao)
- 2 cups pitted prunes
- 1 cup water
- 1 tsp orange zest
- 1/4 tsp salt
- 1/3 cup brown sugar
Preparation:
- First thing, if you are using the liquor method, put it in a small saucepan and cook off some of the liquor.
- Next add the rest of the ingredients EXCEPT THE BROWN SUGAR into a pan. Stir and bring to a boil for one minute.
- Reduce heat to medium low so the mixture simmers slowly and constantly. Cover the pot. Let the mixture simmer covered for 20 minutes, stirring every few minutes.
- Remove the lid from the pan. Let the prunes continue to simmer for 3-5 more minutes, stirring frequently, until most of the liquid has evaporated/absorbed. Keep a close eye on the pan to make sure the prunes don't burn. When there are about 3 tbsp of liquid left in the pan, remove from heat.
- Stir the brown sugar into the prune mixture till brown sugar melts and dissolves.
- Mash the prune mixture with a fork. You can also use an immersion blender for a smoother puree, if you want to. (She recommended a potato masher... large fork worked perfect for me!)
- Let cool to room temperature before using. Store in a sealed, airtight container in the refrigerator. Refrigerating the filling to chill completely will make it easier to work with when filling hamantaschen.
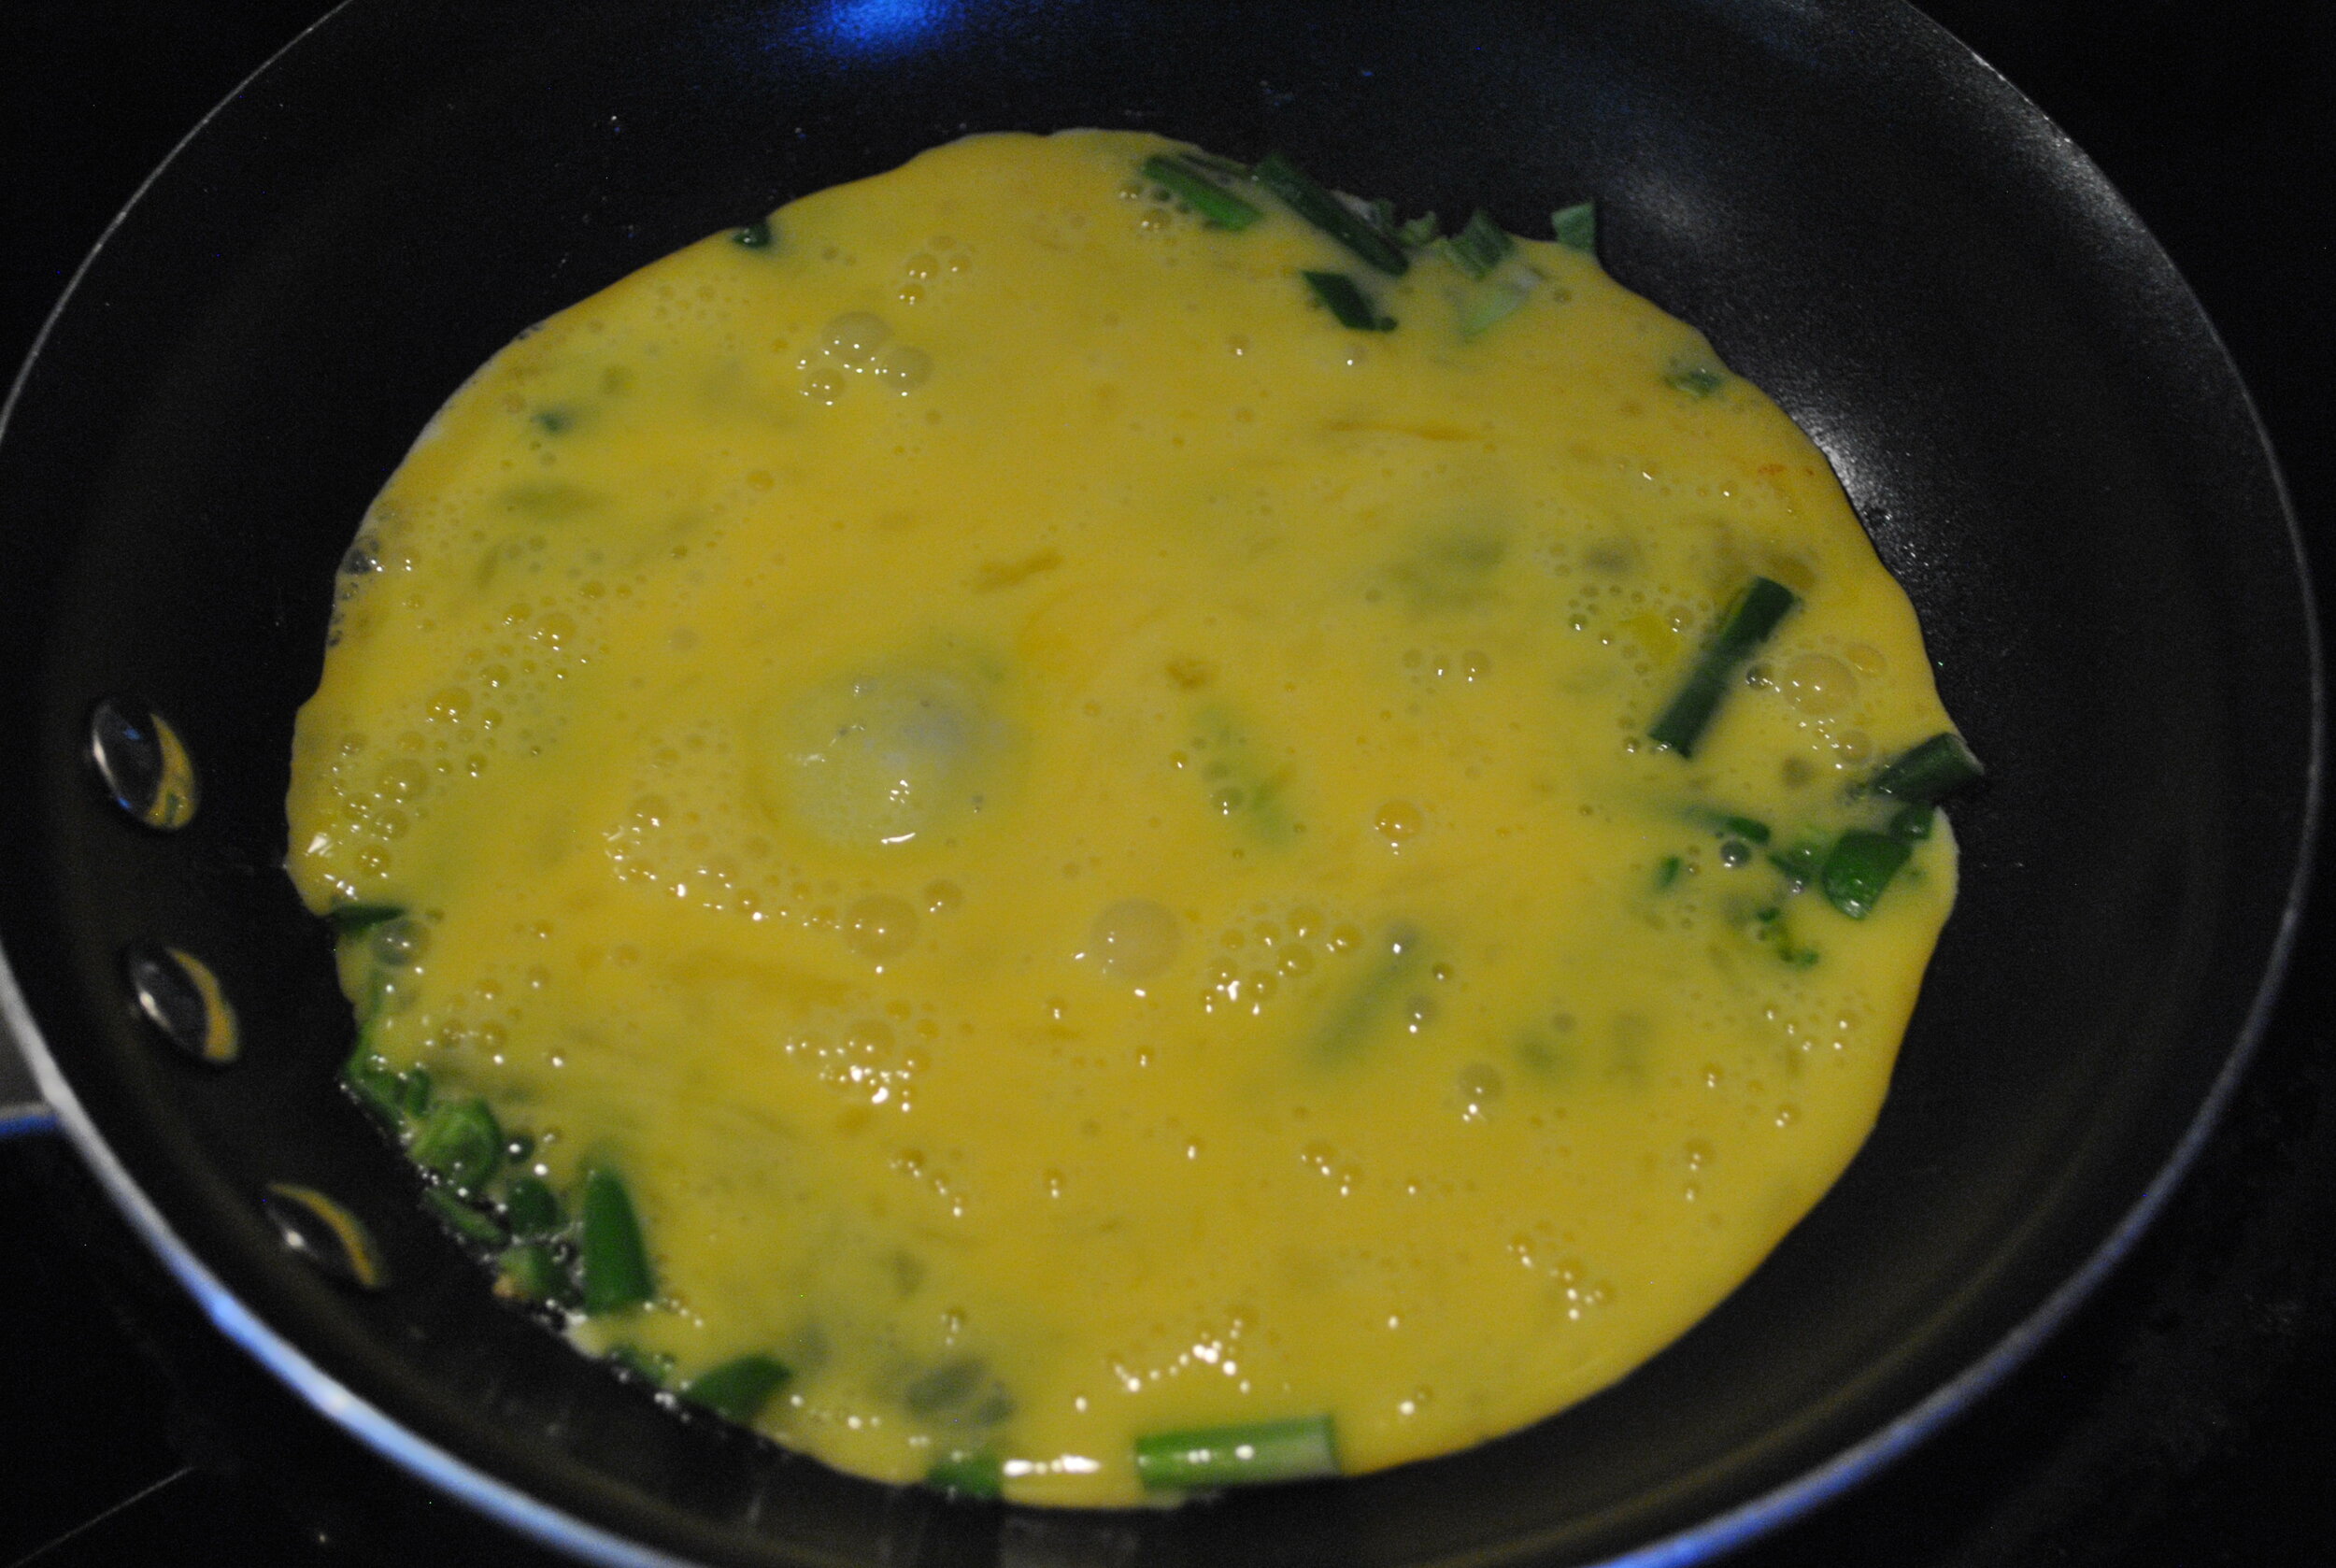
Garlic Scape and Salmon Frittata
This is a summer favorite in the Kosher, She Eats kitchen. We grow our own garlic scapes and jalapeños and Kosher Hubby cold smokes his own salmon. (Yes, I know... overachievers.) One Sunday morning we decided to forgo our usual cheesey eggs (another KSE kitchen invention) and make frittatas with whatever was in our fridge. I will share the 'recipe' and preparation instructions below but first some ideas and explanations.What are garlic scapes? There are two main varieties of garlics and many sub-varieties. These two main varieties are hard-neck and soft-neck. Soft-neck garlic looks just like a mutant, large blade of grass. The magic is below ground with the garlic clove. Hard-neck garlics are neat because they give you TWO edible products. The first is the scape, which if left unpicked will  become a flower with little bulbils (teeny tiny garlics). However, you can cut them off and eat them. They taste like a cross between garlic and green onion. Obviously, the second product you get from a hard-neck is the garlic clove. Here's a picture of our Kosher puppy with our garlics from last season. You can see the scape begins to curl and are fully curled when they are ready.Okay, ideas... this is sort of a kitchen sink dish. You can put what ever you want in here. We choose jalapeños, scapes, cheddar cheese, and smoked salmon because that is what we had in the house. You can use other types of peppers (hot or sweet), regular garlic, mushrooms, onions, spinach, goat cheese, whatever you want!How many eggs? Well... it's a safe bet to do two eggs per person. It depends on how many people, how big your pan is, and how hungry you are. For the larger size pan that we have, we would recommend six eggs. I am not going to put a quantity below, you can toss as much or as little in as you want!As for pans... we used our older non-stick skillets and no additional oil or spray however, this recipe calls for them to go into the oven SO there are a few caveats.1. Non-stick in the oven decreases the lifetime of the pan. We decided to designate a couple of our pans for oven usage, knowing that they will have to be replaced sooner. Fortunately, non-stick isn't too expensive.2. NO PLASTIC HANDLES IN THE OVEN!!Other option: you can, instead of using a non-stick pan, heavily coat a stainless steel pan with oil/butter/non-stick spray. The goal here is to have the frittata slide right out at the end and not make a mess. You will cut this like a pie, so staying together is a virtue for this recipe. We love this pan (this size is the smaller size we use) - Professional Non-Stick Restaurant Frying Pan Size: 8"- the rubber handle is removable![ingredients]Preparation:
- Set your oven to broil
- Dice jalapeños and chop scapes then toss them in the pan with butter to sauté. Sauté for approx. 5 minutes.
- Crack your eggs into a bowl (NOT THE PAN) and beat them together with approx 1 tablespoon of milk or cream (or half and half if you are out) per egg.
- Pour the egg mixture into the pan with the veggies and let cook for a minute or two and then layer the salmon on top.
- Grate cheese on top of the mixture. Add as much as you like.
- Here's the tricky part... when to put in the oven - let the eggs cook until they begin to set up on the outer ring of the pan. It is now time to put it in an oven. Put it on the top rack, right under the broiler.
- Keep watch on the frittata and pull it out when it begins to get golden brown on the top.
- Pull the frittata out and serve immediately. You can top with chopped chives or dill. We did one of each and really enjoyed both!
The process in pictures: 


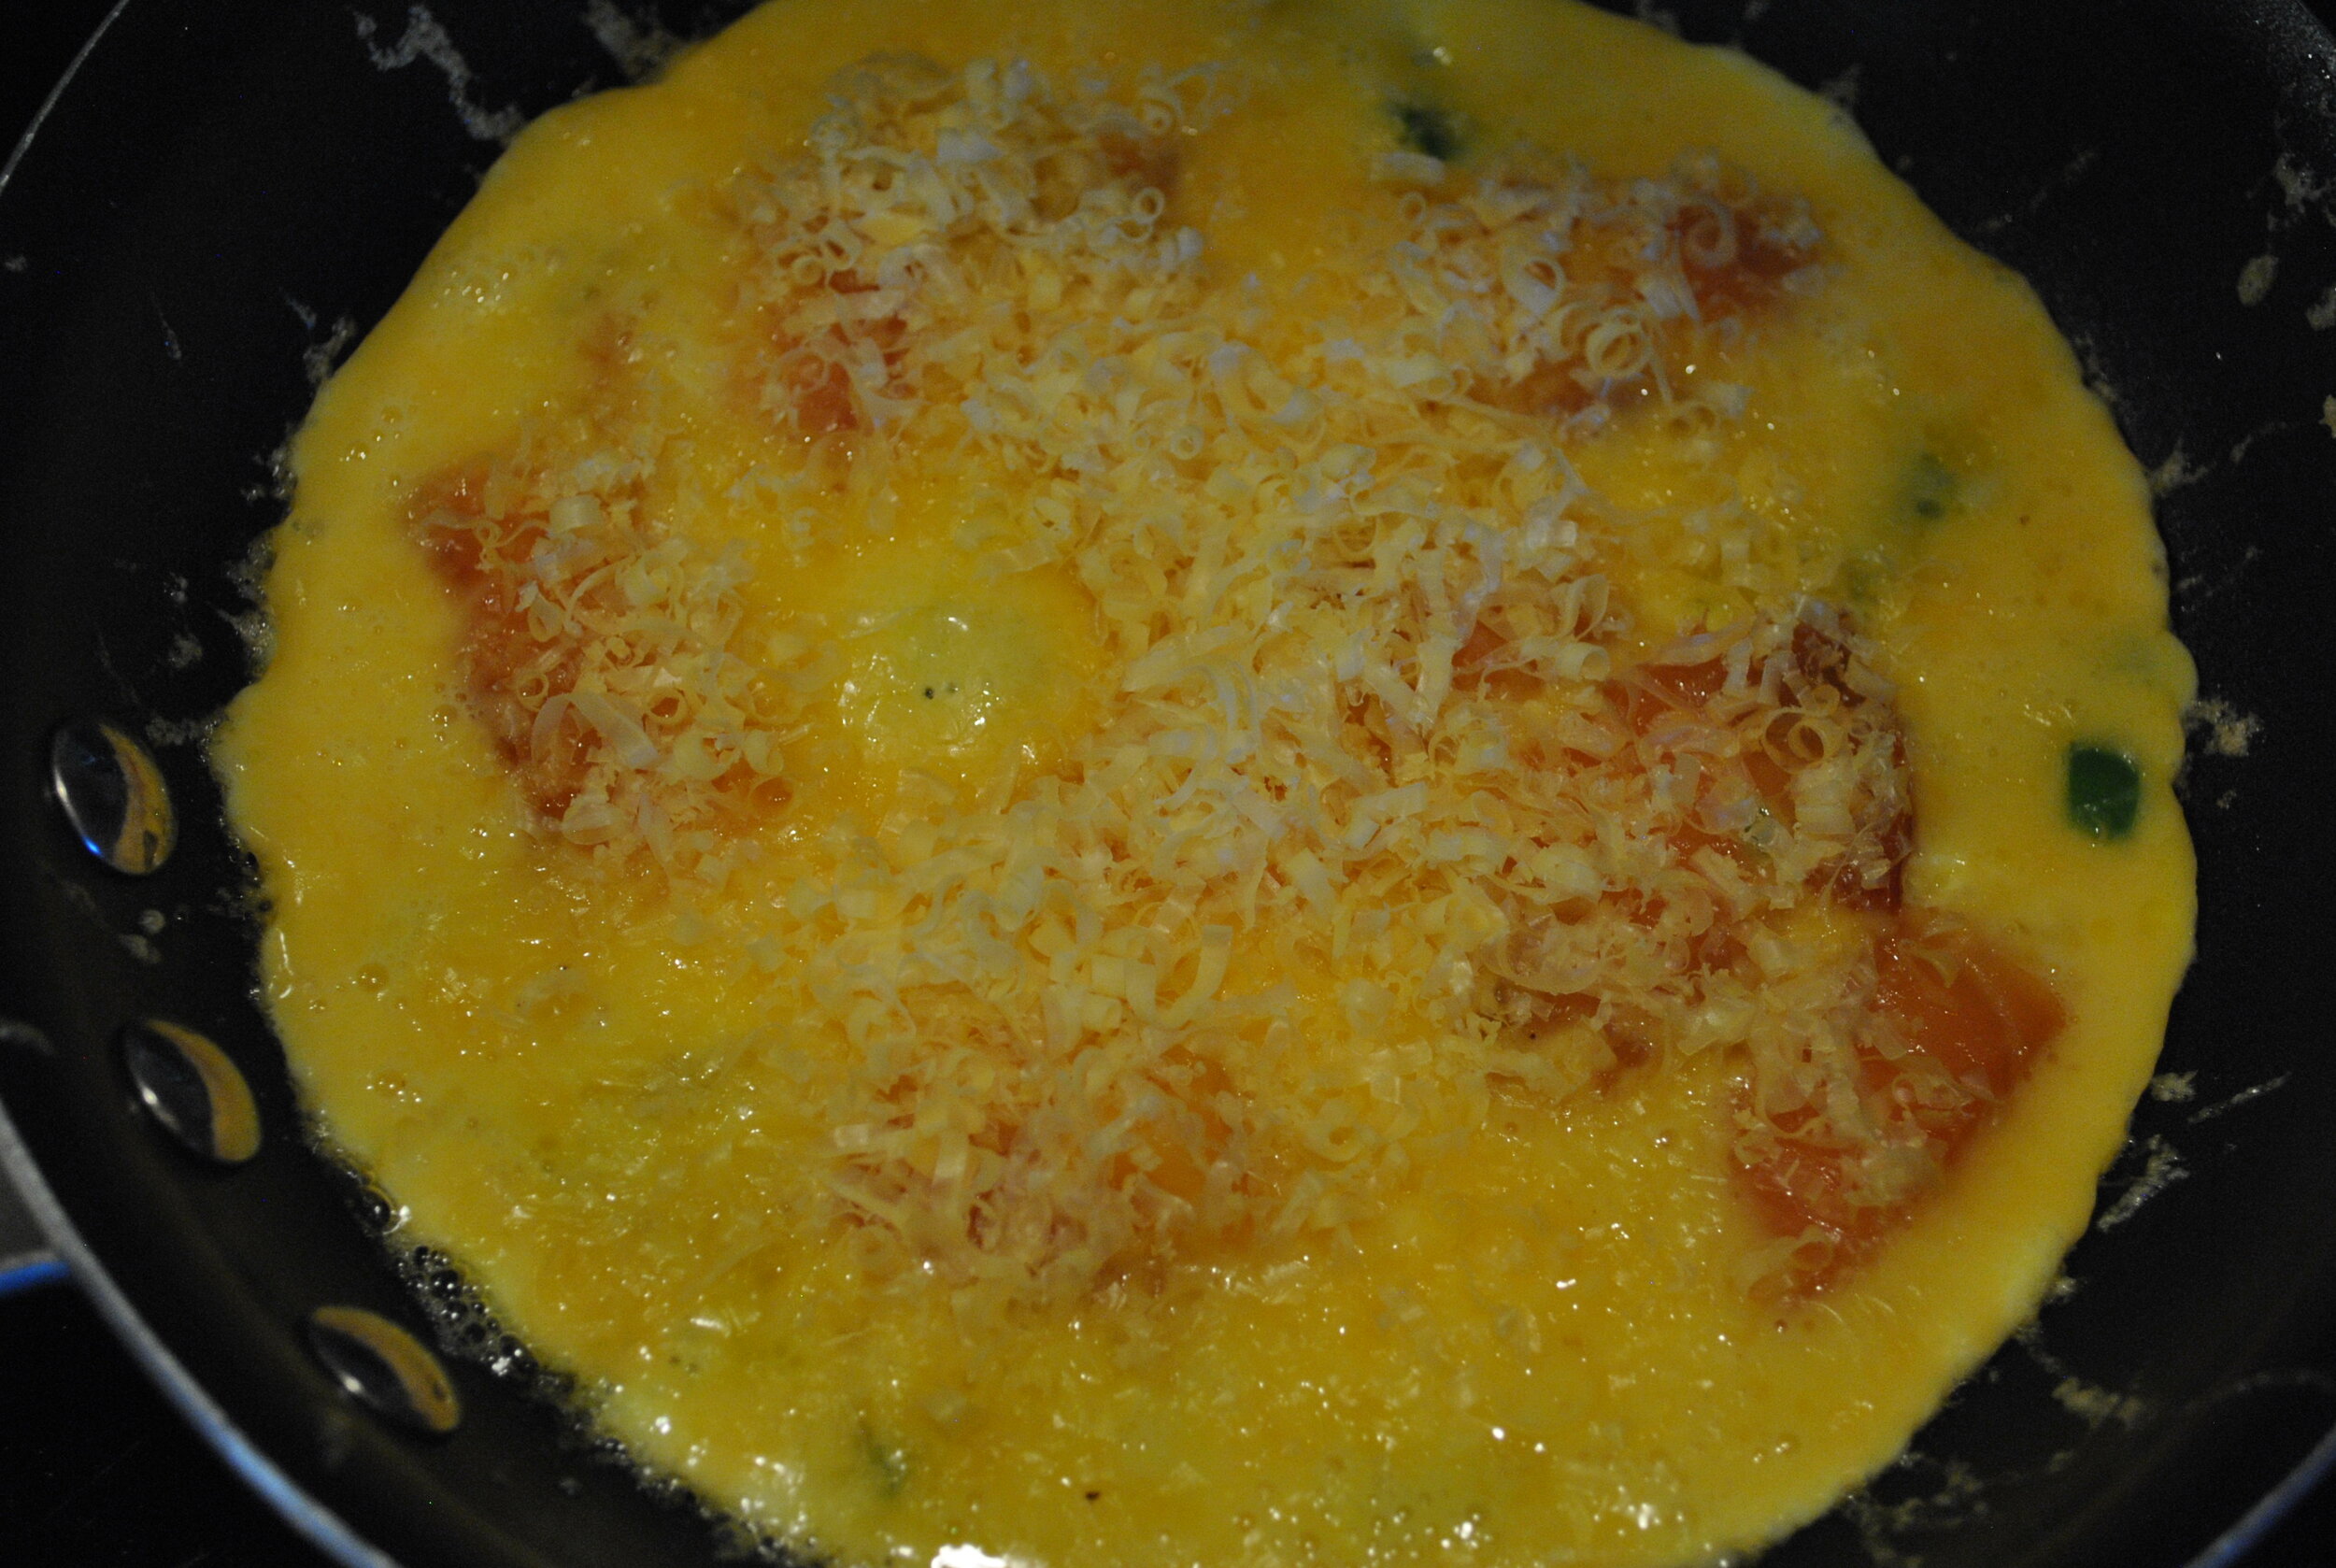 See it starting to set up/cook on the sides? Time for the oven!
 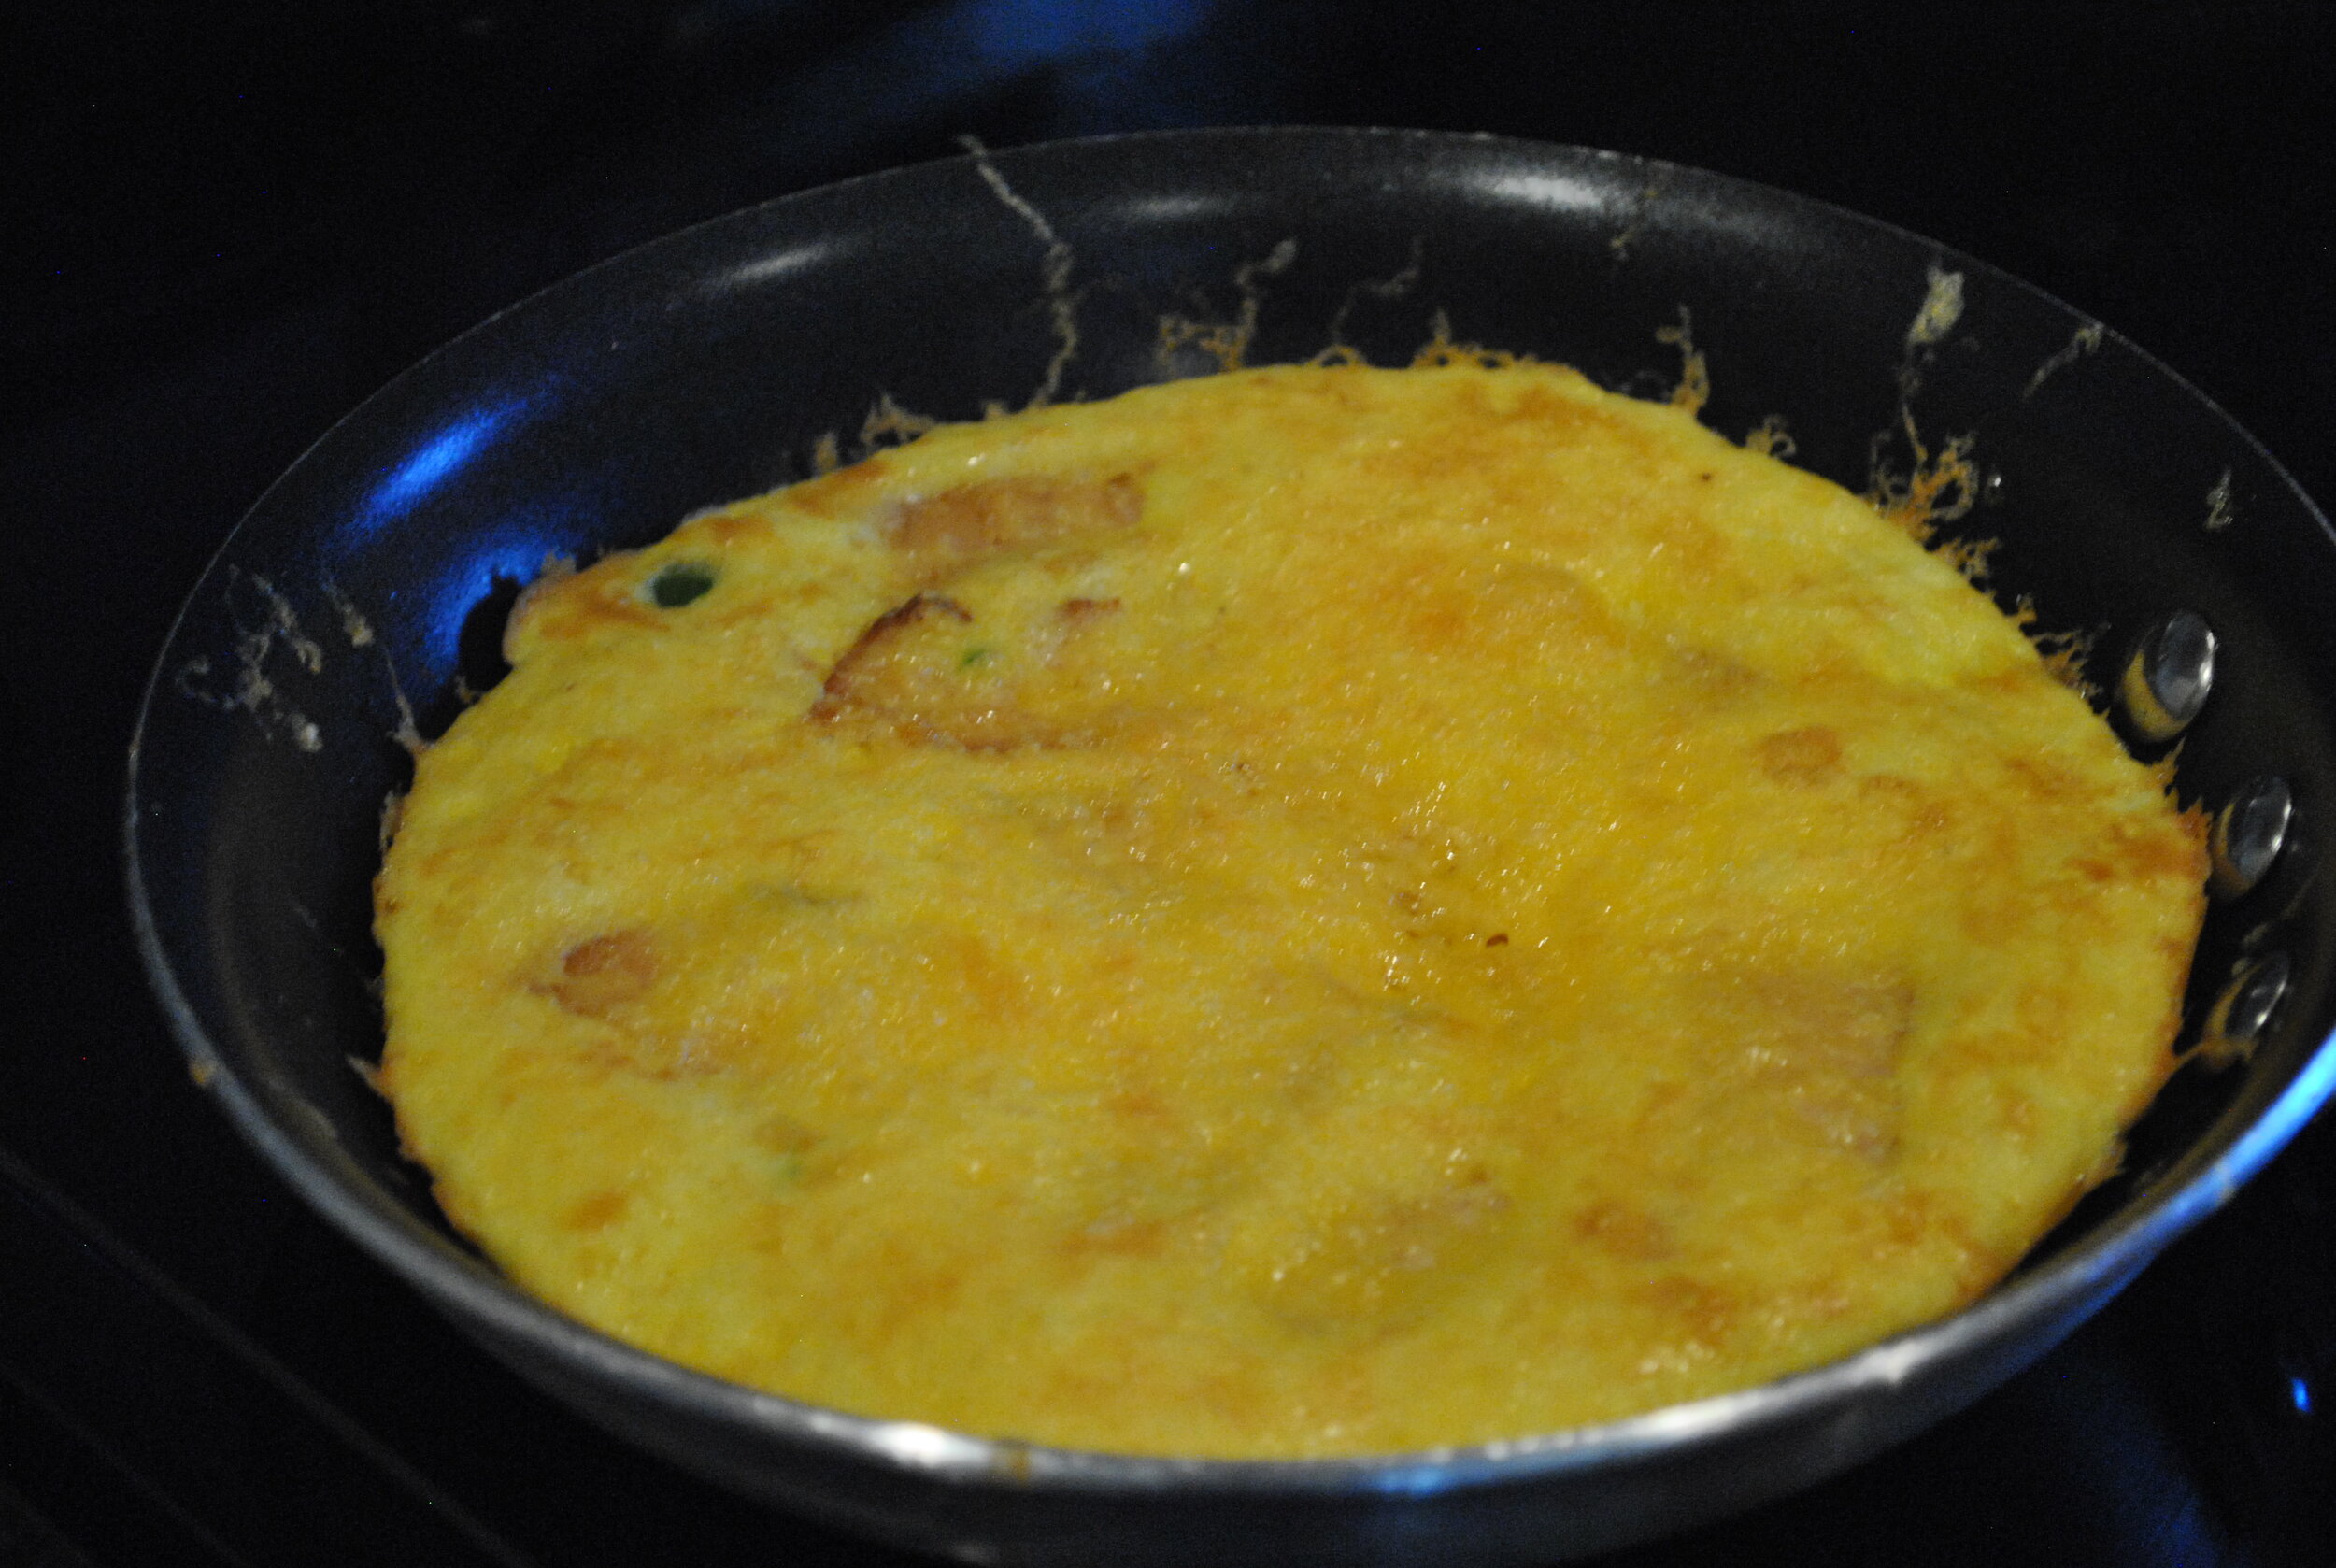 Post oven... no flipping necessary!
 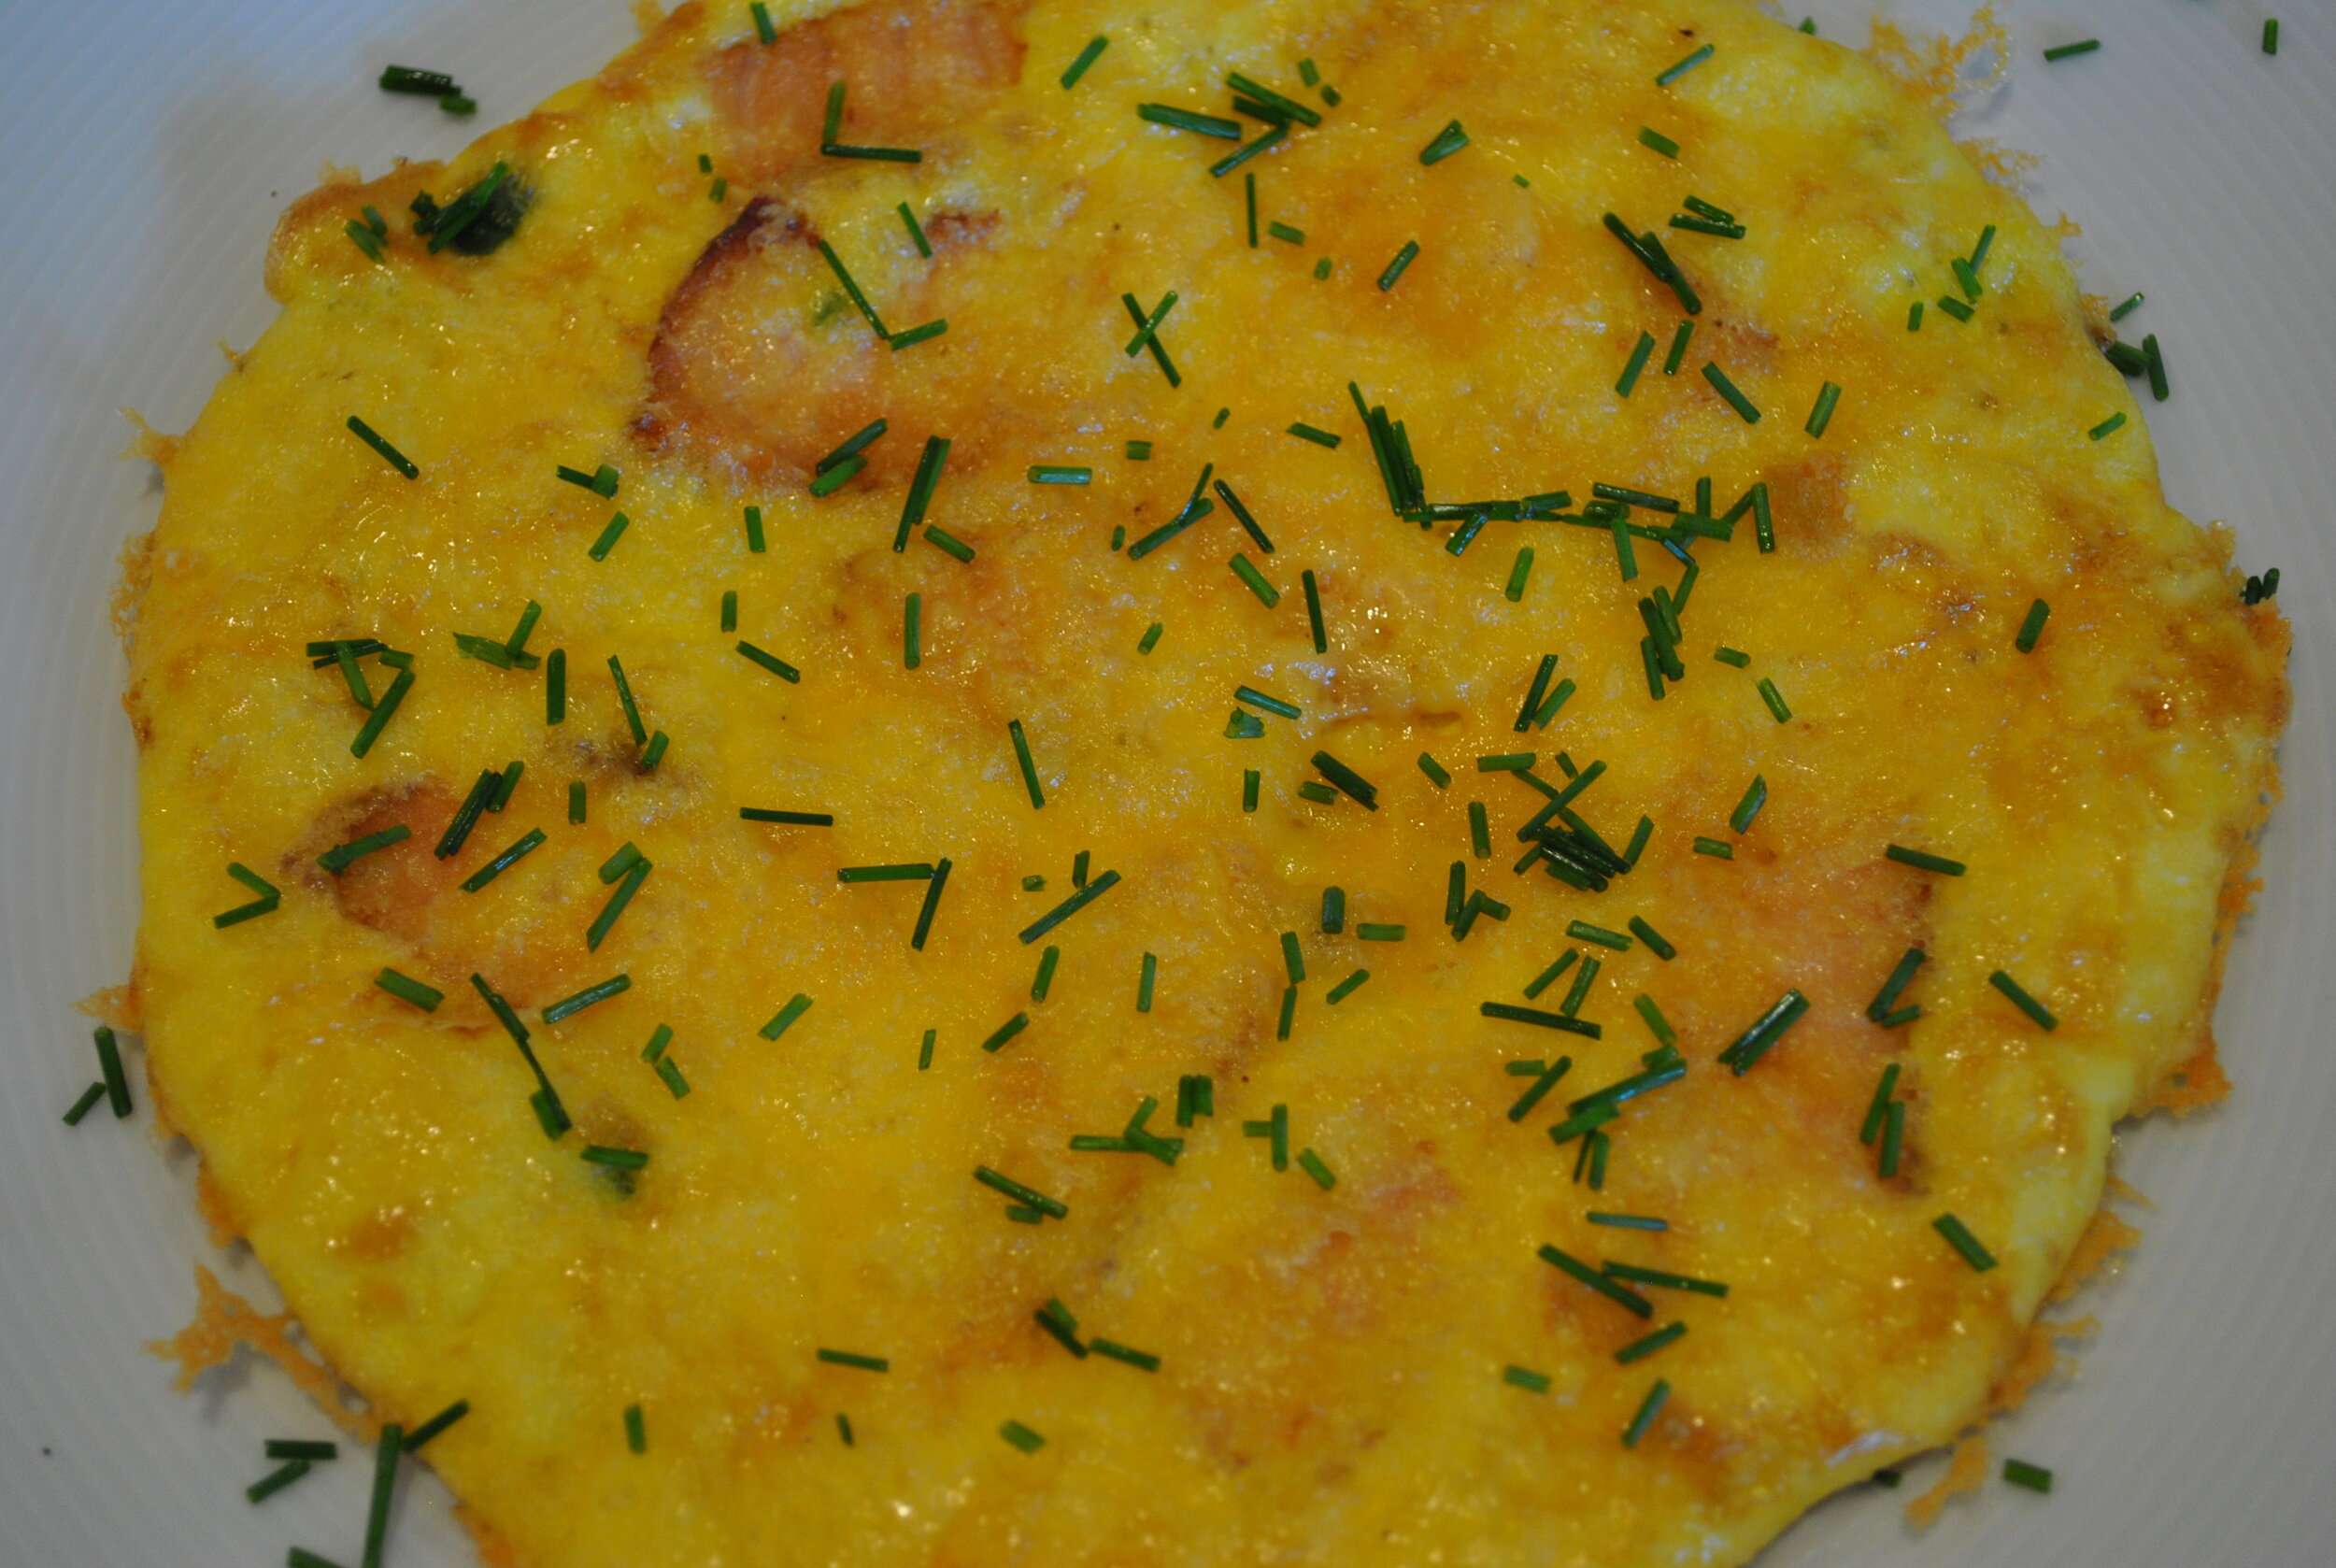 Those are chives!
  And that is dill!
Review: Mayim’s Rainbow Cabbage Salad with Tahini-Lemon Dressing
As you read in this blog - Review: Mayim's Vegan Table - Kosher Hubby and I each selected a recipe we wanted to make out of Mayim's new cookbook to review. This is the one Kosher Hubby chose. He wanted something without pasta, bread, potatoes, etc. We just don't have those items in our diet, or at least very often. He chose this because he enjoys cabbage salad and thought it would be a great addition to our dinner. If you want to see my choice, it is here -  Review: Mayim's Shepherd's Pie.Again here, she says it serves 4 people but it lasted for more than a week in our fridge. Know your tahini... we selected a common, Kosher brand and I found the flavor overpowering and ... not great. I've had tahini before and enjoy it. I did not enjoy this particular product. Kosher Hubby (KH) added his own flare and flavoring to the dressing.[ingredients]Preparation:
- Preheat oven to 325°F. Using a rimmed baking sheet, toast the seeds for 8 to 10 minutes, watching closely. You can also use a toaster oven until the seeds start to darken, or sauté them without oil in a small pan until they brown and become fragrant, about 5 minutes. Remove and set aside.
- Boil 8 cups of water while you chop the cabbage. Slice the cabbage in half through the stem. Slice each half in half again and chop roughly.
 Place the chopped cabbage into a strainer over your sink and pour the boiling water over it. Rinse quickly with cold water. Dry the cabbage roughly with a (dark-colored) hand towel or in a salad spinner.
- In a large bowl, mix together the celery, pepper, cabbage, shaved carrots, and parsley.
- Place all the dressing ingredients in a blender (tahini, garlic, lemon, and cayenne). Add enough water to make a dressing consistency.
- Add the dressing to the cabbage salad just before serving.

It was tasty and KH really enjoyed it. The strong tahini flavor really made it hard for me. We had some that wasn't quite dressed and I enjoyed it. Again I will say this here... I know that ethically, Mayim (and her co-author Dr. Jay Gordon) don't believe in eating animals and you can eat healthily without any type of animal products. We don't agree. In the Kosher, She Eats kitchen, meat is a very vital and central piece of the puzzle. We are really big animal protein people. I respect their views, I just don't agree with them. I found this dish to be another great parve side dish option for a dairy or meat meal.** Disclosure: I received this cookbook for free but I was not compensated for this or any posts related to Mayim's Vegan Table. Additionally, Mayim is a personal friend but that did not come into account while reviewing this cookbook. **
Review: Mayim's Shepherd's Pie
As you read in this blog - Review: Mayim's Vegan Table - Kosher Hubby and I each selected a recipe we wanted to make out of Mayim's new cookbook to review. This is the one I chose. I got really excited because for a long time, I thought Shepherd's Pie would probably be a delicious dish but it was never Kosher (since most include ground beef and dairy). Mayim's recipe offered me the opportunity to try something I couldn't before. She says it serves four. It lasted more than a week in our house (granted there were only two of us). We halved the potatoes because we don't eat much white starchy foods in the Kosher, She Eats kitchen. It still covered the whole dish and we found ourselves eating the goodies under the potatoes. I also did not use the vegan margarine... I just couldn't bring myself to buy it when I knew I wouldn't use it again or often. VERY surprisingly, the mashed potatoes still were tasty without it.Other adjustments? Like I said, we halved the recipe for the mashed potatoes section. We couldn't find canned lentils so we bought some store brand, dried red lentils. They didn't need to soak, just be throughly rinsed and boiled. We were just unsure what the conversion would be between dry lentils and the can... we did about a cup, it could have taken some more. Also, I recommend prepping all the ingredients PRIOR to getting started. It will just help, things move pretty quickly.[ingredients]Preparation:
- Prepare the potatoes:
- Preheat the oven to 350°F. Oil a 9-inch baking pan with the cooking spray.
- Boil the potatoes in salted water until tender; about 29 minutes. Drain, return them to the pot, and mash.
- Place the nondairy milk and margarine in a small saucepan over medium heat and cook until the margarine has melted. Add 1 teaspoon of salt and 1/2 teaspoon of the pepper, and then add to the mashed potatoes and stir well until incorporated.
 In a large pan over high heat, heat the oil and sauté the onion, celery, carrot, and garlic until soft, about 8 minutes.
- Add the Italian seasoning and cook for 30 seconds.
- Add the lentils, peas, Worcestershire sauce, mustard and remaining teaspoon of salt, and 1/4 teaspoon of pepper and cook for a further 5 minutes.
 (I recommend combining the Worcestershire sauce and mustard in a bowl and mixing. It got a little lumpy and I was afraid of pockets of mustard.)
 - Pour into the prepared pan and spread the mashed potatoes on top. Bake for 30 minutes, until golden.
This reheats really nicely and is very tasty cold too. I ate it nearly every day for a week after we made it and enjoyed it each time! However, she uses this as a main dish. It just wouldn't fly in our house. We are really big animal protein people. I know that ethically, Mayim (and her co-author Dr. Jay Gordon) don't believe in eating animals and you can eat healthily without any type of animal products. We don't agree. In the Kosher, She Eats kitchen, meat is a very vital and central piece of the puzzle. I respect their views, I just don't agree with them. I found this dish to be a great parve option for a dairy or meat meal.** Disclosure: I received this cookbook for free but I was not compensated for this or any posts related to Mayim's Vegan Table. Additionally, Mayim is a personal friend but that did not come into account while reviewing this cookbook. **
Review: Mayim's Vegan Table
 I recently received a copy (see my disclosure at the bottom) of Mayim Bialik's new cookbook - Mayim's Vegan Table. I spent a few days going through the cookbook, looking at her recipes, reading the intro, and looking at the pictures. Overall, it's a very well written, interesting cookbook. Not too large or hefty with a nice selection of options in each category. One thing I noticed off the bat was that most of the recipes seemed rather complicated with quite a few ingredients and steps. However, once I tried a few, I realized that yes, there were a lot of ingredients but the recipes weren't too complex.In the beginning of the book, Mayim and her co-author, Dr. Jay Gordon, discuss vegan principles and how easy and ethical it is to eat this way. While their views do not reflect the views of the Kosher, She Eats kitchen, I respect them and their convictions. One big thing for me was, I wished there were more pictures and that they were attached to the recipes. The book has a picture section in the center and while the images are amazing, it's easier to visualize a dish when there is a picture nearby.The next few recipes I post will be from Mayim's cookbook. Kosher Hubby and I each selected a recipe to try and we made them on the same night. Mine was an entreé and KH's was a side dish. Unfortunately, it was just not enough of the right kind of food to satisfy our hunger. The KSE kitchen does not contain a lot (or really any) pasta, white potatoes, etc and many of the recipes are heavy on that. We are also avowed meat eaters. Like I said above, while I respect their views, we don't choose that lifestyle. So we made some meat to have for dinner as well.I found this cookbook to be very useful, well-written, and interesting. I think it holds a very important place in a Kosher kitchen... it offers you 200 some pages of perfectly PARVE recipes that you can use with any meal. From starters to salads and mains to dessert, you know what you pull out of this cookbook, you can use with anything! I appreciated having so many parve leftovers in my fridge so I could pull them out when I was craving them with either a dairy or meat meal. You can purchase Mayim's Vegan Table by clicking here.
** Disclosure: I received this cookbook for free but I was not compensated for this or any posts related to Mayim's Vegan Table. Additionally, Mayim is a personal friend but that did not come into account while reviewing this cookbook. **
Want me to review your product? Contact me at koshersheeats @ gmail . com